Wednesday, February 21, 2018

Vent To Power Vent Conversion on FWC


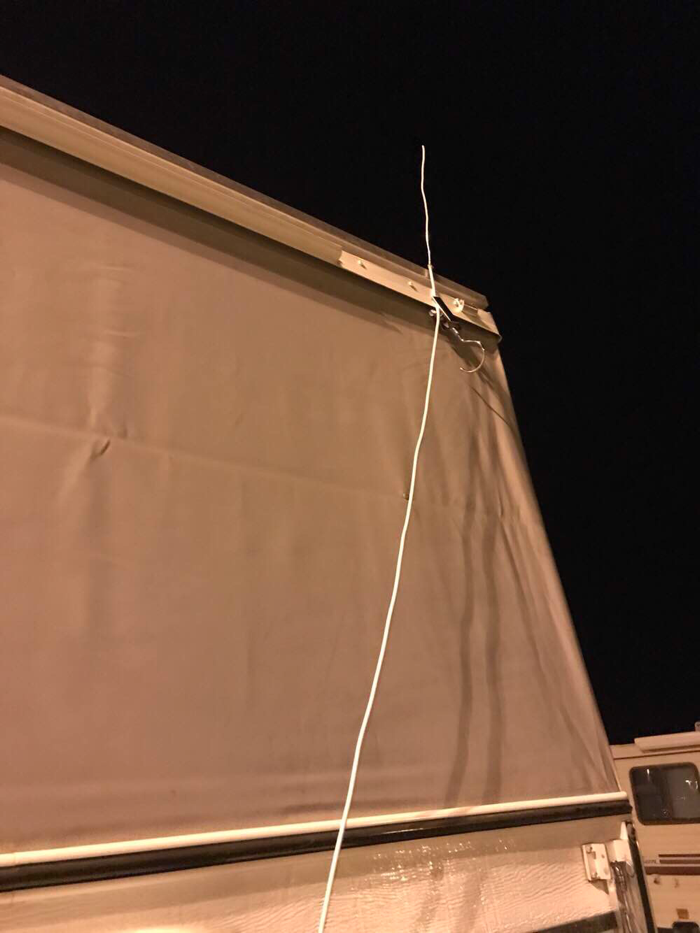
In my first picture I show you the roof as I purchased my FWC camper.  With the rear in the foreground, the first smoke colored vent cover is over my sink/cooking area.

The problem was that it was only a passive vent without a fan.  The second smoke colored cover further towards the front came as a power vent with reversing fan to push out and pull in over the double bed.

Having the powered vent over the bed was not convenient, as I cool in the back and I often sleep on the lower bed and not lift the roof.  With the roof down the fron vent is blocked for usage as it is smothered in bedcovers.  I quickly realized that I needed a powered vent in the rear over my cooking / sink area for my upcoming 2018 Travels.


In order to move forward, I first needed to determine if I needed to replace the whole vent or attempt an upgrade to a power vent.

Atwood Mobile Products makes the Fantastic Vent so I called them and I was told I could upgrade and leave the roof and vent cover in place.  They told me the model number to order after I told them that I wanted a reversing vent like my other vent, but also wanted a temperature controlled switch.  They have one with the rain sensor on the cover to detect moisture and close automatically, but I didn't feel I had the need for that option.

I ordered the kit I needed from them on Amazon and found some quiet time to dedicate my efforts on the upgrade.  Luckily the FWC was in my garage during the summer as the directions didn't work exactly as the directions indicate.  It assumes you have a lid switch to sense that the cover of vent is open enough for fan to operate and you don't figure this out until you start wiring everything half assembled.

I was going to call Atwood back for the information and complain about the upgrade not having the part, but decided to search and find the switch on Amazon and ordered it from Atwood though Amazo.


In the end it assembled correctly, except that they supplied another roof cover lifter That I couldn't figure out why and I left the lifter that was on the vent as it originally came.


Here is the extra feature I got that isn't in the one over the bed.  This knob allows you to set the temperature that the fan turns on at.  A few degrees below this setting the fan shuts off.

I find this auto feature great for cooking and as it warms up I figure it will help exhaust heat in the camper to keep the temperature at a good level to run the Engel more efficiently.

Brent

macaloney@hotmail.com

Camper Floor


When I was building out my camper in the cold garage last fall, the linoleum was cold.

I also wanted something to easily clean.

I chose a rubber entry mat from a discount store and cut it to size.

So far it has worked great.  I have vacuumed it and even power washed it at a car wash to get the dust and dirt out and hung it to dry.


In an attempt to keep the cold out as there is no insulation in the floor, I placed a piece of Reflectix under the carpet.  This too seems to keep heat in and cold out.

The carpet cost about $10.00 and Reflectix I had from a roll I had bought a few years back.

This is lots better than a cold floor in the morning.

Brent

macaloney@hotmail.com

New TV Antenna & Camper Mounting


I last left my TV antenna blogging as a stripped wire that I used to pick up TV in Tucson.

This worked ok in the city but that's not what will work in the desert.


First I needed to find a way to mount my magnetic base for my antenna to an all aluminum roof and rack on the FWC camper.

Above is a galvanized framing part I flattened in 3 sides and used one right angle side to the aluminum roof rack.

As with other mounts on the roof and frame, I use a 10-32 expansion nut.  I drill a hole in the 1" square aluminum rack frame and insert the expansion nut and use stainless steel 10-32 hex bolts I used to mount the solar panel to the roof, and bolted my steel bracket so Otis not higher than the roof rack


Here is my new TV antenna I got delivered in Tucson to an Amazon Lickbox. It is like the one that broke but less tall and wider.  It claims to have a better amplifier circuit too.


I needed to find a place out of the way to secure the antenna when it's not outside.  I had bought two of the galvanized framing bracket and flattened all sides and screwed it to the underside of the FWC cabinet.

You can see that the mounting base holder I had made for my Prius travels for the antenna fits the new antenna.  

The only difference is that the cutout for the antenna base is larger as the circuit on this new antenna is smaller


When I park with the rear of the camper to the TV towers I can mount the antenna base magnet on the steel step on the rear of the camper.


Left / right orientation I can use the steel clip that holds down the pop up camper roof.


The best way to get reception is to use my new mount on top of camper as it gives me height and adjustable angle to the station.

The cord on the new antenna is smaller and fits easier though the closed door jam until I find and install a porthole for the TV cable through the camper wall.


I use the above app to orientate my antenna to the towers.


I see my location with a wire circle with blue dot and orange arrow.  As I spin I can point the phone until it aligns to the antennas I want.


Now in this picture you can see the signal transmission area.  You just tap the TV icon in the app and it shows the signal area.  When I was in Havasu I was just off the lower edge and couldn’t get a signal when at the fireworks festival.

I then moved to another spot so I could get TV with my new antenna.
Brent

macaloney@hotmail.com


Lower Bed / Recliner


My FWC lower bench camper seating/bed is shown above.  I feel very comfortable on this bed and it's the same size as my Prius bed for the last 3 years.

In my Prius I used the back of the passenger front seat for my inclined bed to sit in bed.  I wanted the same in my FWC camper, so I decided I would build an incline before I left on my 2018 Travels.


I had this repurposed piece of 1/4" plywood in my basement that would work well for my incline.  It slides under the bed and doesn't take up any room.


I prop the plywood on the head wall and my foam bed bends to match the incline.

Toss my pillows on it and I'm able lay inclined facing the TV to watch over the air television or a DVD from RedBox.

Comfort on the road.

Brent

macaloney@hotmail.com

Tuesday, February 20, 2018

Places I’ve Been - Day 26 to Day 44


I left you all on 2/1 in Buenos Ares National Wildlife Refuge (above) and headed to one of my favorite spots, Tucson.

The reason was that my focus turned to writing about mycamper and designs.  I have 3 basic blog followers.  Those that like the adventures and pictures, those that like the technical aspects of living in the road, and those that want to know my opinion about my experiences in the truck/camper vs the Prius.

My blogs take time and for longtime followers, I don’t want to bore you with writing about the same old places I have visited in previous years although new followers may not have read about them.  I enjoy some places that I go back every year or every few years.

I have lots more technical aspects to write about my camper for you “how to” folks, but I needed to update you all on where I’ve been.


The first stop after Buenos Ares was Tucson I wanted to hike the fabulous mountains in the area.  Above I’m on the Starr Pass Trail.  A great hike on a cool morning as you have a lot of morning sun.

Tucson is one of my best places to visit for its diversity of hikes, warm temperatures, disc golf, ease of getting things you need, ease of driving, and I could go on.  This is thectime I ordered items for delivery from Amazon.


I played disc golf and visited this brew pub Thunder Canyon Brewery in downtown Tucson.

A great beer and burger was my experience 


Yes I visited my favorite haunts like McDonalds for my morning iced tea and WiFi.  See my camper through the window?


I worked on projects like my tv antenna stopped working and I wanted to watch TV so I ordered another from Amazon and made a short wire to pick up the TV in the city until the new one it came in.


There’s my temporary antenna.  It only works in the city but good enough until the new one comes in.  I have a more perm I ate design I will blog about later.

I did get to watch the Super Bowel game in the comfort of my camper bed/lounge.  To be the subject of another blog post.


After 4 nights in Tucson where all my Amazon orders came in on time to the Amazon Lockbox,  I headed out to Hot Well Dunes (above).  This is BLM land north of Bowie, AZ.

Here there are two maintained hot tubs where geothermal water is pumped up during the day with solar.  It is $3.00 a night to camp here but with my senior park pass it is only $1.50 a night.  I’ve gotten to know the camp host over the years and he is great with the the people.  

I did some desert sand hiking here and the dunes and sand use leg muscles that you don’t regularly use.

After spending 3 nights at Hot Well Dunes, I wanted to get back to Tucson for the Friday night opening ceremonies for the Olympics.


Not realizing when I elected to take Social Security distribution that there was a voluntary ability to have Federal Taxes taken out, I stopped by to the Tucson Social Security Office to address this.

I was never offered to elect voluntarily Federal Tax withholding.  I waited 15 minutes to speak to someone who offered me the form.  I elected my deduction and handed over the form and I was on my way to watch the opening ceremonies for the Olympics.


Yes there are a lot of wonderful sunsets, even in the city.


With my foot feeling much better these days and many short hikes behind me, it was time to try my favorite long hike in Tucson.  That is King Canyon to Wasson Peak.

With an early start you often get to see wildlife.  The above picture is one of 6 deer that crossed the upper part of the trail.


This hike was right after a storm came through so it was a bit cooler and quite windy.  This Peak has great 360 views of Tucson and west to Kitt Peak.

I met a couple that are here for a brief vacation and were touring the sites.  They picked Wasson Peak for the same reasons I like it.  They parked in Saguaro West National Park side.


This section of the trail shown above is the steepest and there are switchbacks for the incline.


I took a discontinued trail on the way up.  In the picture of my AllTrails hike record above, the side loop to the right is a trail no longer marked or shown on maps, but it is very visible from a distance.

Google maps showed the visible trail, so I put pin drops at the turns to find my way.  Since there is less foot traffic there is less erosion and rocks to twist the foot.


After spending nearly a week back in Tucson a storm was coming in that would linger for a few days and to the southeast of the state.  I spent one night in the rain and it was time for me to seek out sun so I drove to Quartzsite last week Thursday.  


On Friday I texted some friends in regards area and we met up on BLM land just south of Sara Park where the Lake Havasu Fireworks Festival was taking place.

We climbed a hill to watch the firworks with the intent to go to Sara Park on Saturday for the larger fireworks night.


Yes and more wonderful sunsets.


Saturday night the fireworks started at 7:30. We went over at 5:00 and all parking was full, so we went to a higher part of the hill and watched the fireworks from there.

It was good but there was too many delays between companies competing at the event.


Sunday morning 2/18 - Day 42 I visited the Lake Havasu City Swap meet.  

Next to the swap meet is a restaurant that offers $4.99 burger meals as a special Sunday lunch.  I had seen the long Line in the past trying to get in but the line was relatively short and I got in.


It got cold.  Highs in the 80’s turned to highs in the 50’s with blustery winds.  I decided to tour parts of Lake Havasu.  Playing disc golf, taking photos, and Hiking Sara’s Crack from Sara Park to Lake Havasu.  It’s a 2.5 mile each way in a wash through a slot canyon (Sara’s Crack).

In Sara’s Crack the terrain changes with deposits from runoff.  The last time it was easier to climb through, but this time it was harder.  One place there is a rope affixed to the canyon wall that you use to lower and climb back up on the return.  It is about a 10 ft drop and smooth rock all around.  This year there are 2 other tough places but it is possible to climb, although someone brought and left a piece of aluminum ladder to help in one spot.


Lake Havasu City is a great place to stop and spend some time.

Brent

macaloney@hotmail.com


Thursday, February 15, 2018

Camper Waste Water System


Four Wheel Campers (FWC) do not come with a waste water storage system.  Their sinks drain out the side of the camper and you apply a right angle garden hose adapter and run a garden hose to a pail or storage container on the ground, or just on the ground.

The problem with this is that I park in parking lots and streetside and I would not want to have water from washing hands draining on the ground in these places.  I also don’t want a tank I have to store and pick up each time I move.


Therefore my sink needed to drain into a tank.  I would normally use a commercial tank but not having the time I chose a 4 gallon water tank and drain into that when I’m not in a place to drain on the ground.

One good thing with these Reliance tanks is that the screw cover has a spigot That is a standard pipe thread to make what you want.

The first picture above shows the tank and the strap to hold it in place under the sink.  


I first chose a rubber hose as shown above in stead of a garden hose as it was more flexible when removing the tank.  I wanted to be able to leave the hose connected as I lowered the tank so any residual water in the hose would drain before disconnecting and dumping.

The rubber hose worked but it was large and bulky so I redesigned.  I actually redesign a lot of things.  I start with one design and find a better way and redo it.

The other problem with this first design is that I have no method of draining waste water on the ground.


Enter my redesign.  

From the bottom the sink i still have an elbow, but now I go to a garden hose thread.  Then to a garden hose wye with shut offs.  


One side of wye - I then have one side go to the wastewater tank through a barb hose and back to garden hose adapter to a garden hose quick connector from Home Depot (above) to make removing the wastewater tank easier to remove for dumping.

The other side of wye - The second side of wye also is a barbed tube but this tube goes through the base of the cabinet into the space between the camper and truck bed.  The Tacoma has a poly bed and has a storage compartment in the rear on both sides.  Inside this storage compartment are drain holes.  You’ve got it.  The barbed hose fits through the drain hole so the drain from the sink exits under the truck.  I didn’t have to put the drain through the side of the camper.

This design allows me to drain into tank when needed and then switch to draining in the ground when appropriate.


One issue I ran into on the road was good particles from washing dishes clogged the smaller diameter barbed hose.  I found a a small drain screen (like one in Amazon picture above) at one of the tent vendors in Quartzsite while at the RTR and this solved my problem


I switched to camping soap this year to be environmentally friendly with my waste water.  Above is the picture from Amazon on what I bought.  It works as well as other soaps for washing hands and dishes.

Brent

macaloney@hotmail.com


Clouds & Rain Impact On Camper Solar


Even in sunny Arizona it gets cloudy rain and even cool.  I designed my camper solar / battery to last 3 days powering my Engel fridge without sun/solar.

3 days may not be much for my vandweller friend Ming in British Columbia with days of clouds and showers, but for out of the gate on my camper but you should understand I can charge from my engine while driving too, but have not done this to prove out my solar setup.

So, here I am in Tucson with 2 days of rain and a forecast of 2 days of clouds after. Being a vandweller means if you don’t like the weather, you move.

I wanted to do some testing first.


It’s fully overcast outside with rain this pm.  I’m playing disc golf this am and I went in to check my solar.  Yea! Total clouds and 1.14 amps coming in.  My fridge uses a max of 12 amps per day, and even though I’m going to use more power than I take in today, I will take in enough to get a fourth day off my 50 Ah LiFePo4 battery.


16 watts with heavy overcast off my 170 watt panel is good considering there are no specs for panels and what you can get from your system in the clouds.


In terms of voltage, with sun everyday and what I use overnight, I wake to 13.2 or 13.3 volts on my LiFePo4 battery.

I tell others that they don’t need fansy meters on their system, as long as they understand their systems voltage.

Here it’s simple.  My voltage says 14.0 volts from the cloudy solar and running the Engel fridge at the same time.  I also know that the battery is full after it reaches and sits at 14,7 volts.  The conclusion is that I’m charging on a cloudy day.  How much is the clamp-on meter above at 1.14 amps


It rained heavy all night and decided that the forecast didn’t suit my vandwelling and decided to head to Gila Bend, AZ for the night.

When I got there I was on the edge of the rain and just decided to head to Quartzsite, AZ 2 hours further.


In Quartzsite I got well ahead of the rain and clouds. I had sun all pm driving to my camping spot above.


In the morning I woke to cloudy conditions, but that would be only temporary.  

My fridge is the most important item to keep poweredoff the solar and I had no problem doing it and know that once I go east I will be tested more.  The good news is that my solar works with clouds sufficiently to get me through a number of days with the fridge alone.

During low solar conditions I do not watch TV, run my ceiling fan or charge devices to leave solar for the fridge.  

Although more solar is always better, and my friend Ming comes to mind knowing she would want/need 2x the solar I have, I am good with my current setup.  Yes I still have charging from the engine as a backup charging at 10 amps per hour.  So, one hour of driving will get me close to a charge needed for one day of running my Engel.

Brent

macaloney@hotmail.com