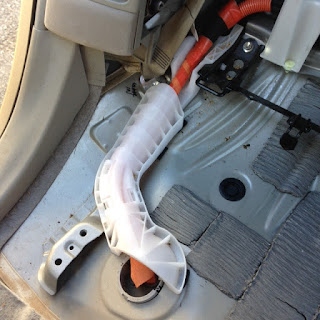
In order to have my 1/2" plywood design support my weight I need to support the plywood when it is lowered into place. When I lower it there is no flat place to support the plywood and no good way to protect the wires to the gas tank (above) or the high voltage battery cable (orange) below
I noticed that there were brackets on the door side of the gas tank and another bracket door side on the high voltage battery cable side.
Further inspection of these brackets show that both have a threaded hole and a punched hole.
If I could find a way to bridge the two brackets side to side I would have a level surface to work from.
Above I designed this aluminum angle stock but then I needed a way to support it and connect it to the unused Prius brackets.
Above is the passenger side where I took a block of plastic wood that I use for my projects and the bolt to the left is the threaded hole so I used a metric bolt and bolted the plastic down. I then drilled a hole in the plastic to align with the punched through hole and bolted the angle aluminum to the block.
I needed the bar as far forward as possible as there is a hump in the middle of the metal floor and also this gave me the lowest profile for protecting the wires without loosing too much space.
I made the plastic block and bolted it the same way on the passenger side with the high voltage hybrid cable. You can see that the Prius has the wires for the fuel pump and they fit nicely under the metal support I made. I needed to add a couple pieces of plastic wood to the underside of the angle aluminum so there would be intermediate support along this soft aluminum stock.
You can see how close I come to these wires in the middle of the area I span. Note the plastic wood elevating the angle aluminum on either side of this connector to protect it from damage.
Since the bolt that goes though the through hole has a washer and nut on the underside you need to wrench the bottom nut and ratchet the top to tighten.
The next part will install bed platform.
Brent
macaloney@hotmail.com


No comments:
Post a Comment