Tuesday, March 9, 2021

Ham Radio In FWC


I got my Ham Radio License a couple years ago, in part to stay in contact with friends on hikes, safety off-grid, and amusement. I was initially licensed as KC1KOV. 

PS. After testing up to the top of Hsm Radio levels, I was given a vanity call sign of WM1T.  I waned the change to designate I was operating at the Advanced level and shorten the phonics of the call sign, Whisky, Mike, One, Tango.  Much easier than Kilo Charlie One Kilo Charlie Victor.

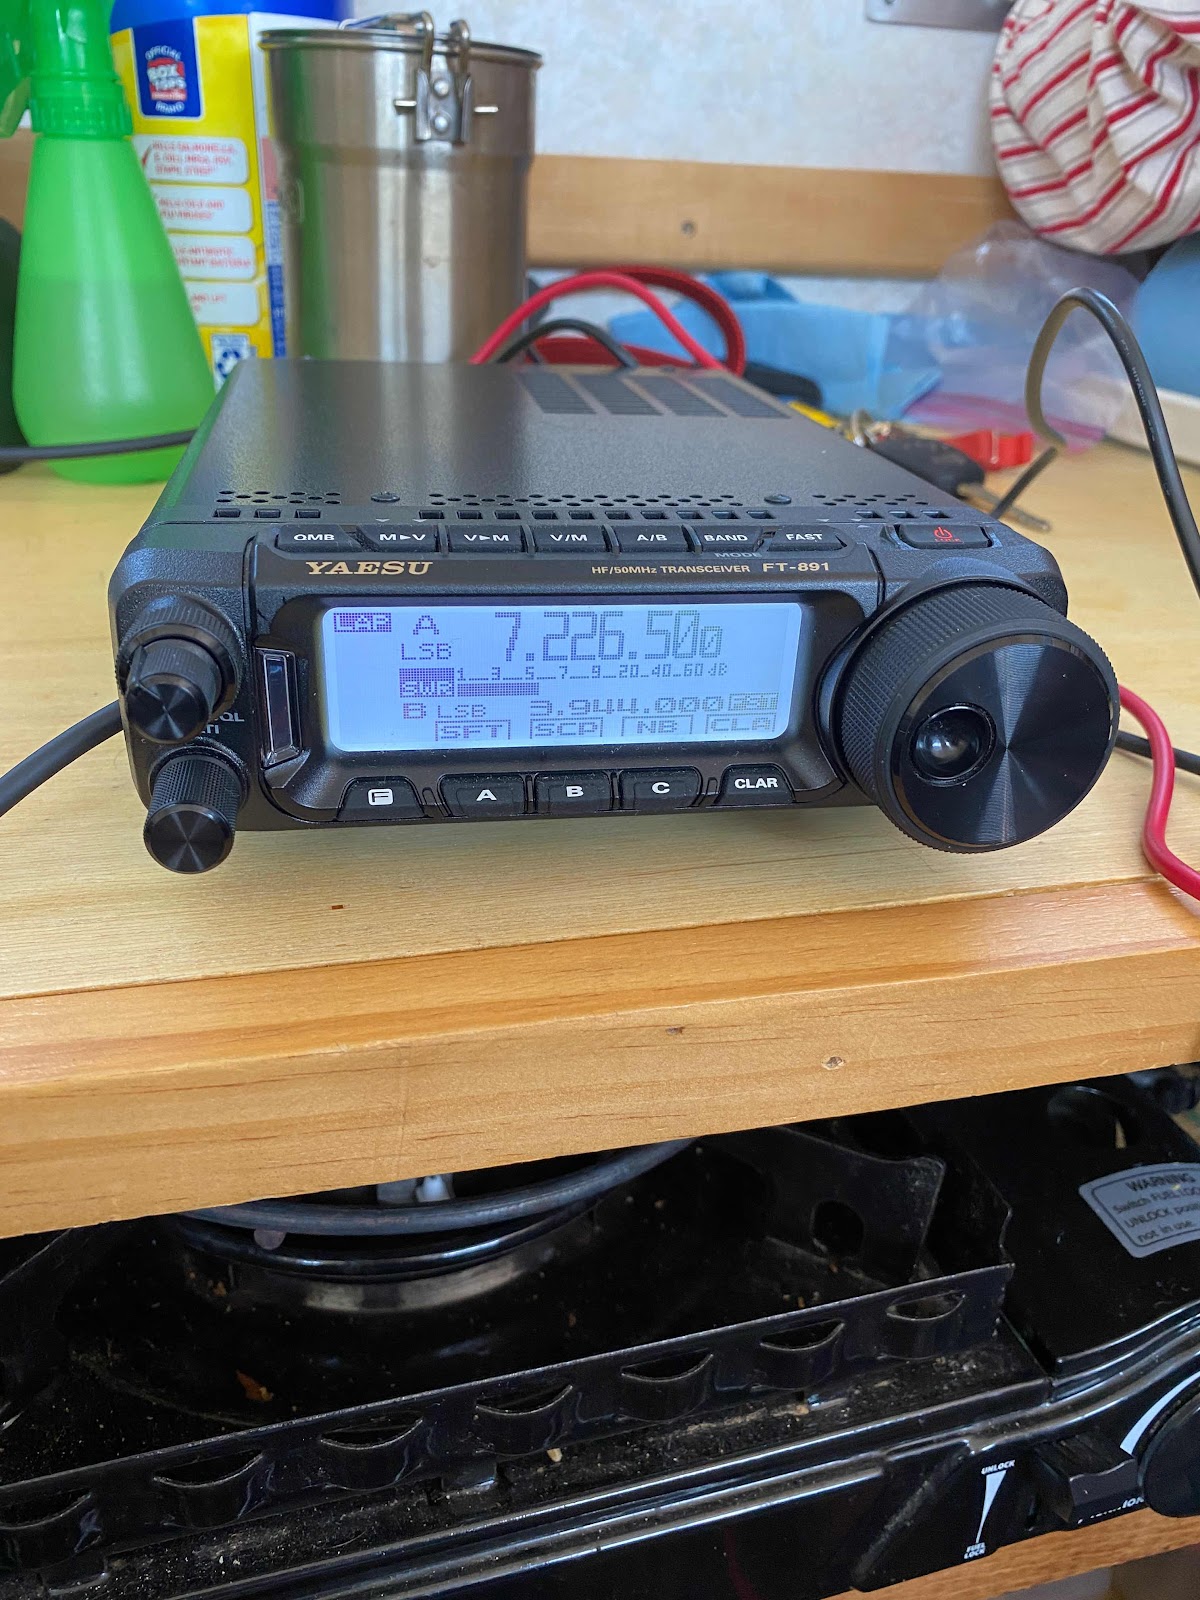
My Vandweller friend Dan Cordray KD4PWP had recommended The Rafio in the picture above.  It’s a a Yaesu FT-891.  I was lucky enough to find one on sale from a Ham in a neighboring city and bought it.

There are a couple things you need to use the radio in addition to a license, and they are power and antenna


Above is my solution to power for my Ham Radio.  I added a bulkhead Anderson Power Pole connection to plug into.  This is connected to my solar charging battery system.


For the antenna I needed a way of getting the antenna outside and not leave the door cracked with the wire hanging out.  Above is a straight hole through the front wall of the camper.


On the opposite side I made a bulkhead connector for my antenna to tie into. As shown above.


Lastly I needed to mount my antenna.  I chose a stick antenna system where I have a magnet base mounted to my FWC roof.  (Picture above) This antenna system has a different stick to screw into the base based on the shortwave frequency band I am operating on.

I can switch to VHF and UHF using the same antenna bulkhead connected to an antenna to match those frequencies connected to my portable

On my travels this past winter, I checked nitro a number of shortwave contacts up around 500 miles away.  In case of emergency and no cell service this method can get a message out if needed.

I do not drive with that tall antenna mounted and I am only on VHF/UHF while driving. Usually monitoring 146.52.

This antenna will also mount to the top of my painters pole antenna mount, I built and covered under separate blog post to mount tv antenna.

Brent
macaloney@hotmail.com

Mounting IPad In My FWC


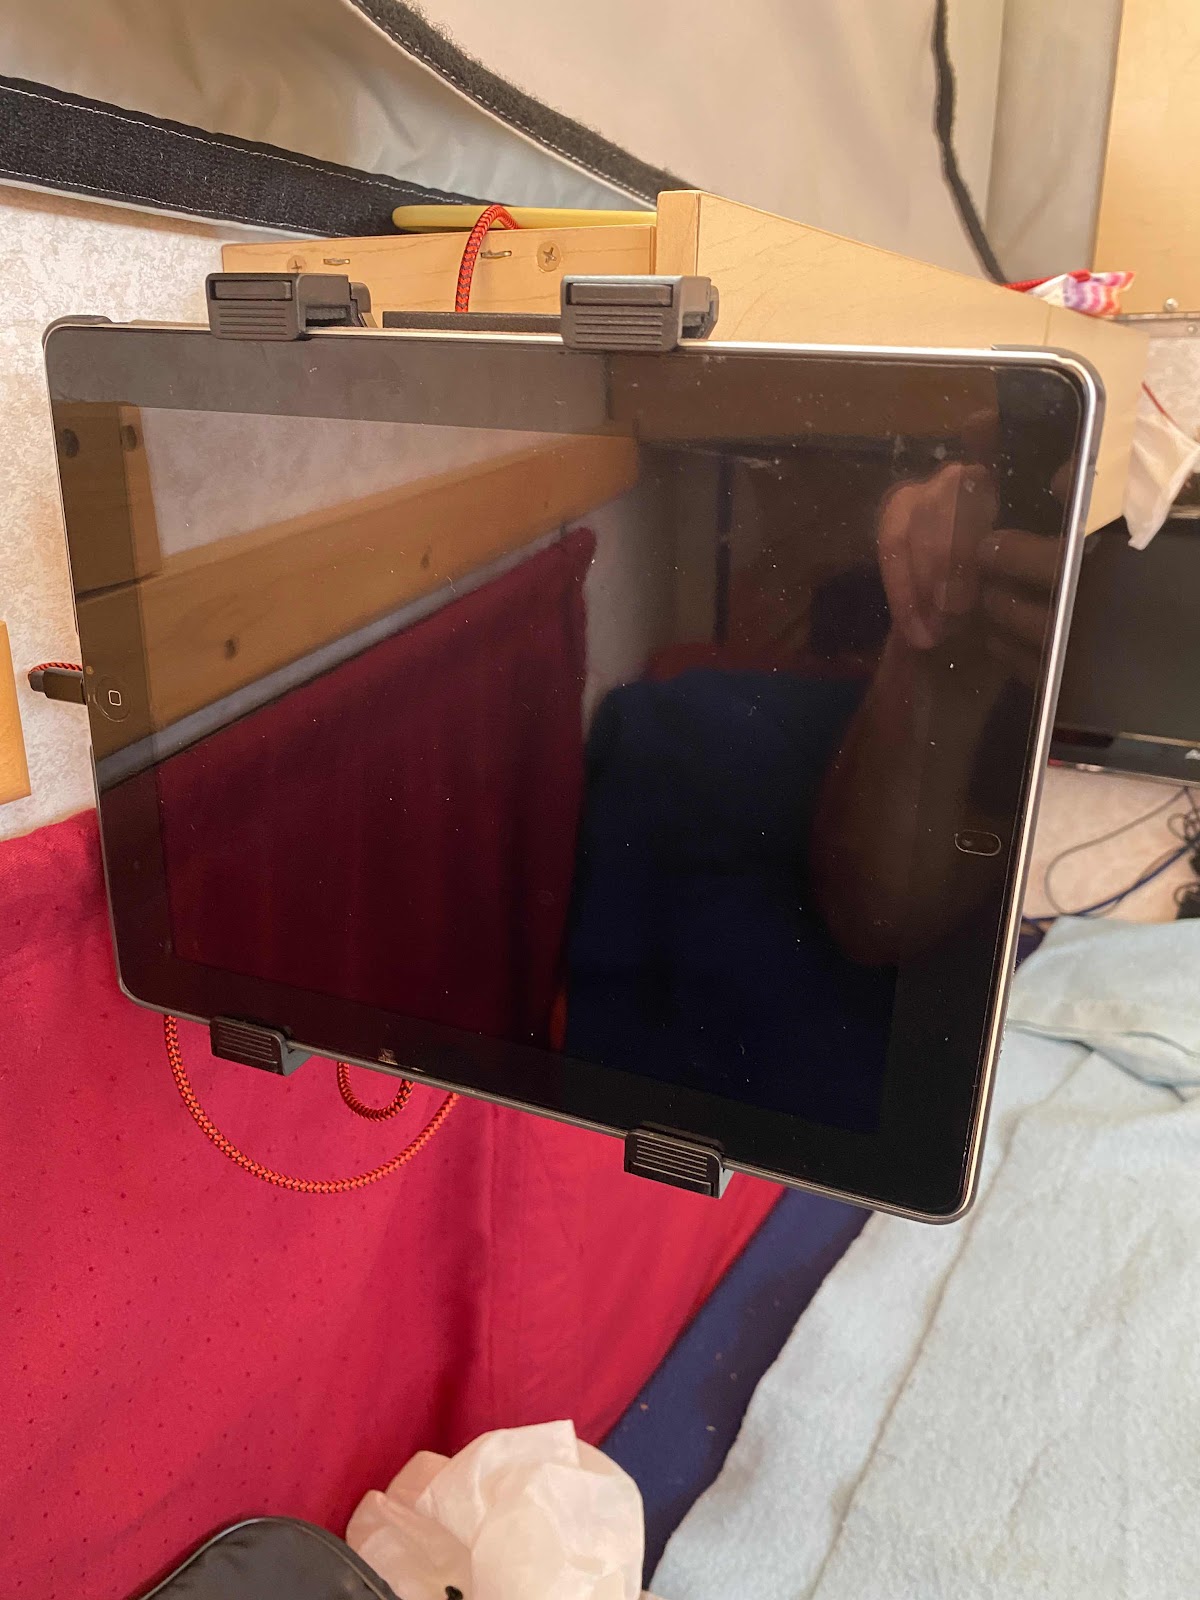
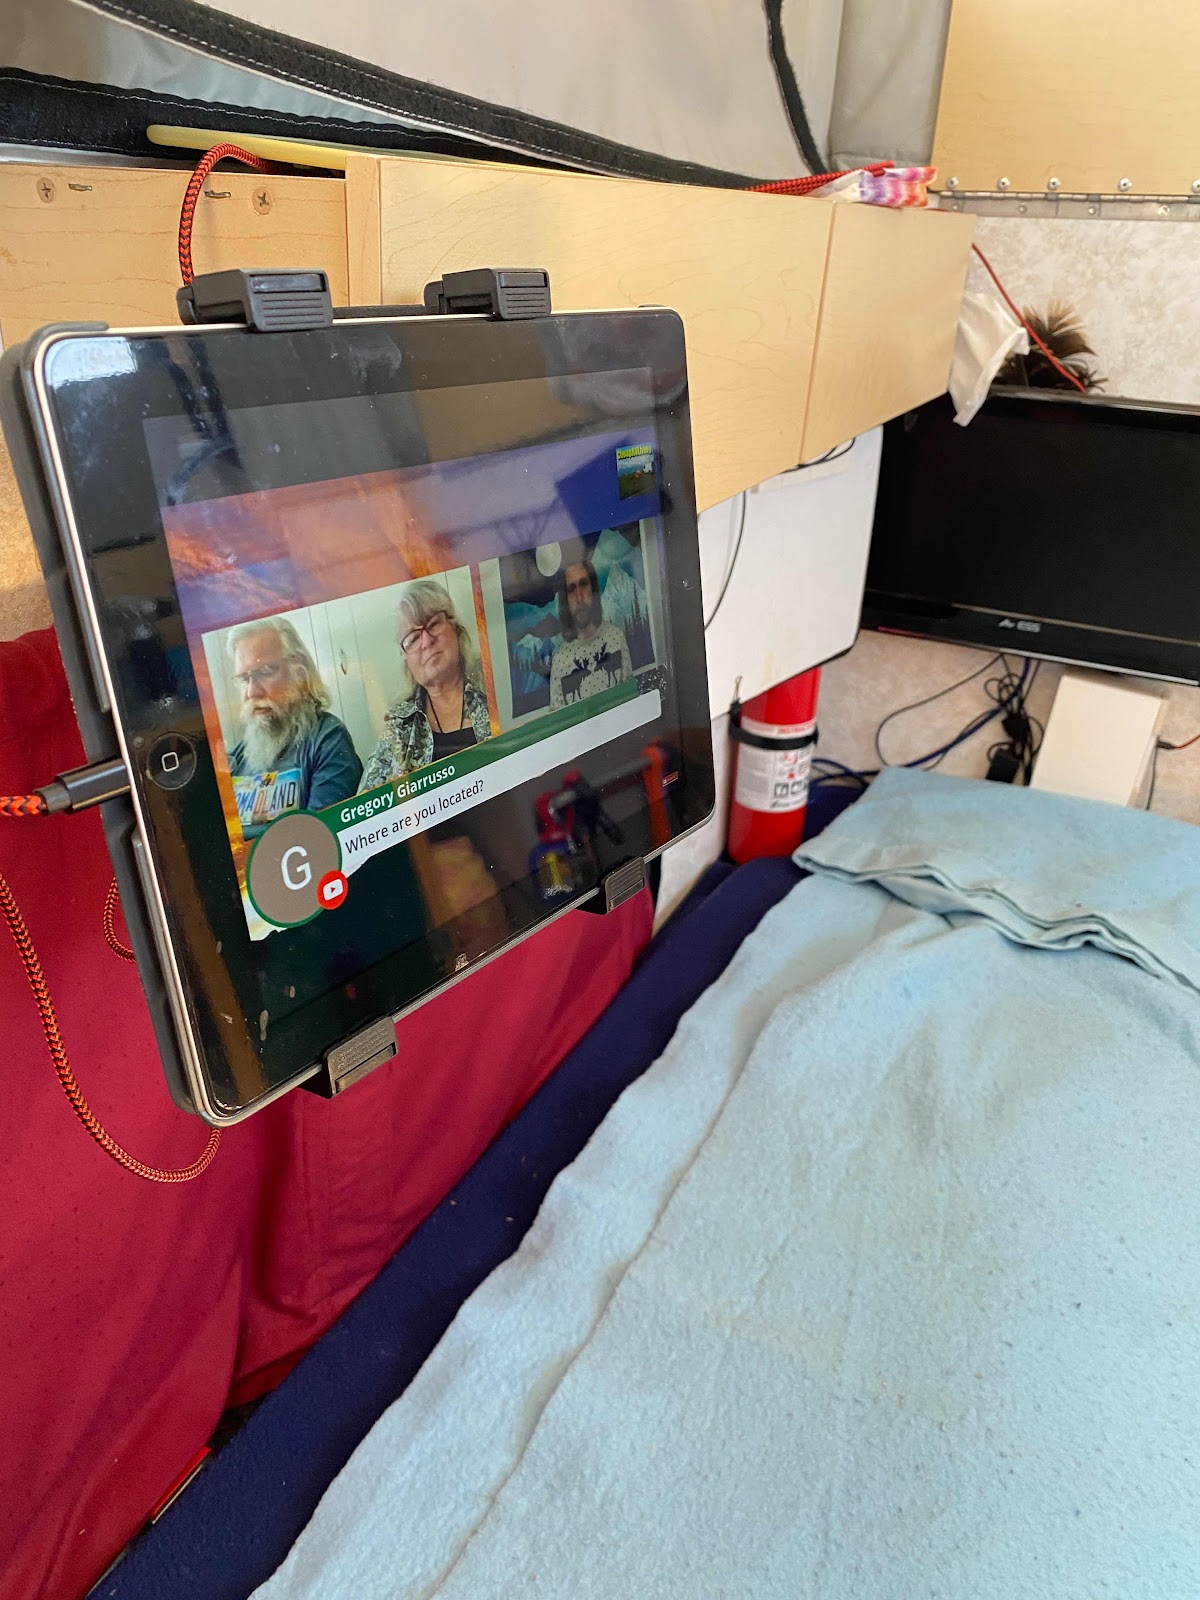
After mounting my IPad , shown above, I wondered what took me so long to do it.  To the right and rear is my TV/DVD player.

I mostly sleep on the lower bench, and often with the roof down for a bit of stealth or warmth.  The IPad is mounted within the length of my arm and tv has the remote. 


I wanted an adjustable mount and not specific to IPad.


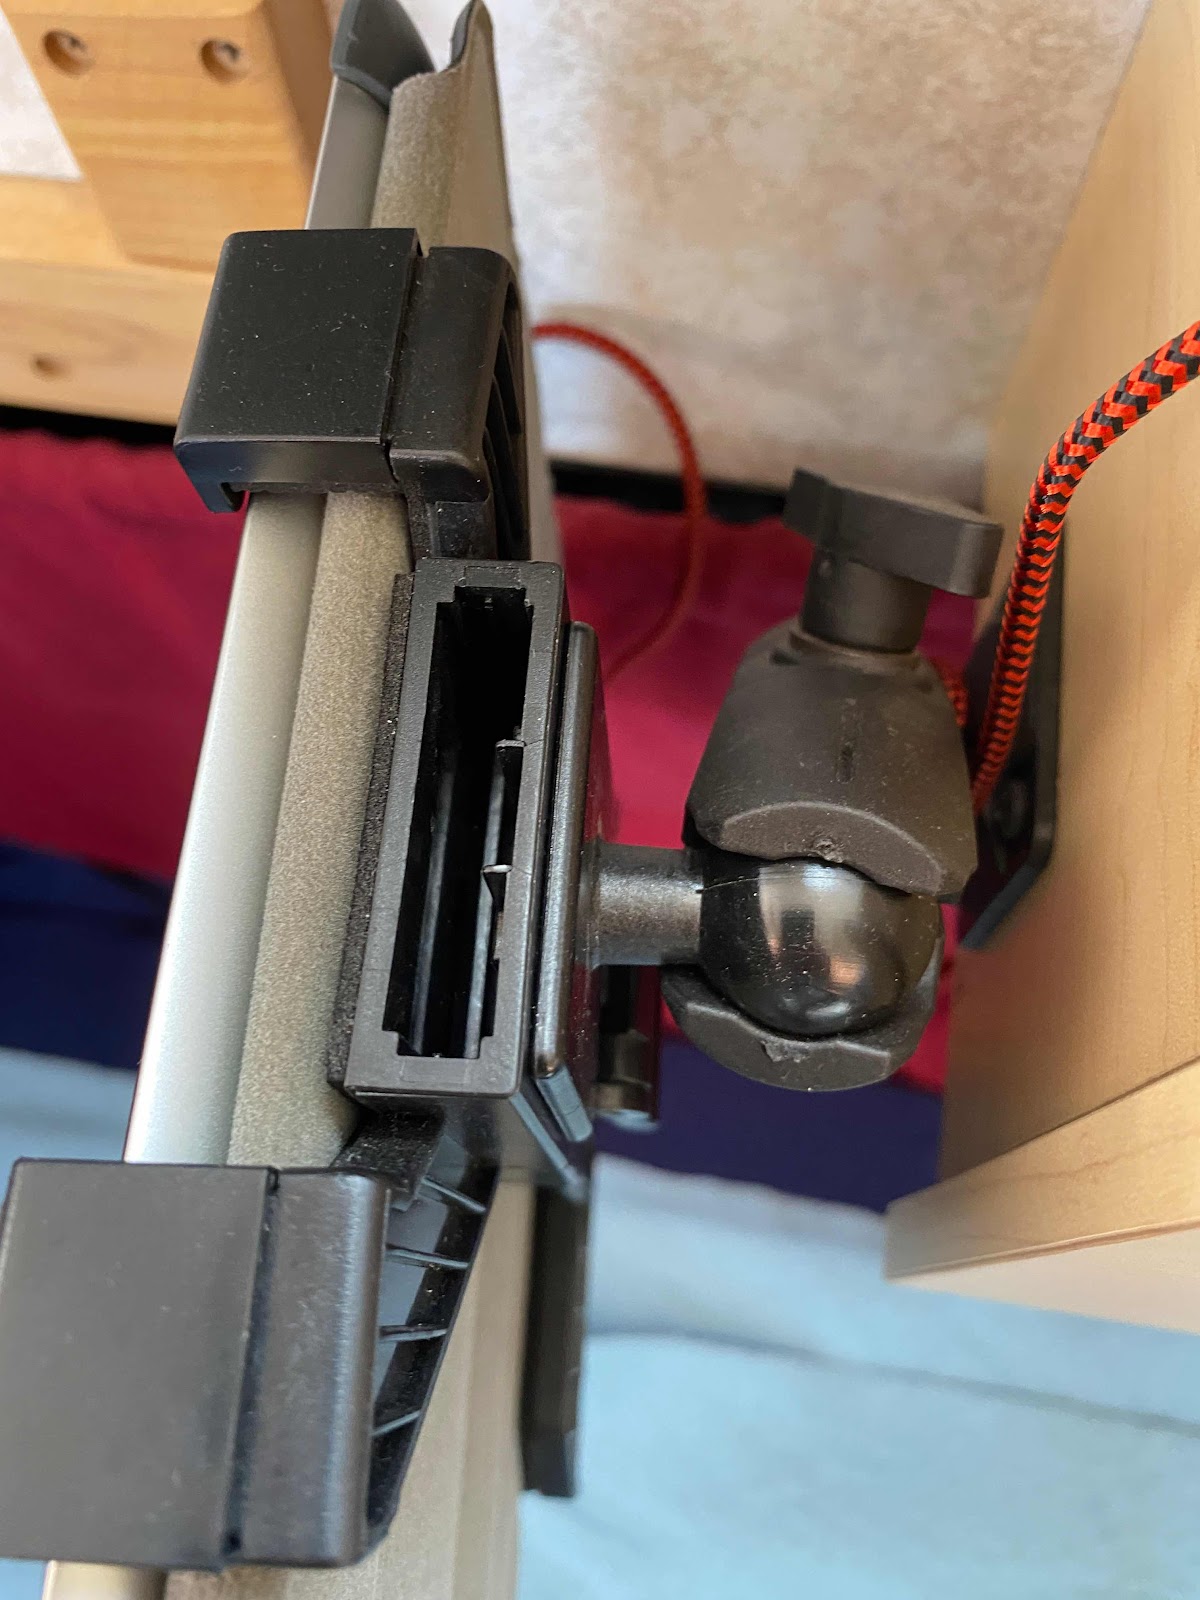
I also wanted a ball mount system as they are highly secure and durable.


Of course I wanted a mount that would articulate for various viewing angles.

Yes, that’s Bob Wells and Suanne Carlson on the screen as I watch their YouTube video on NomadLand movie.


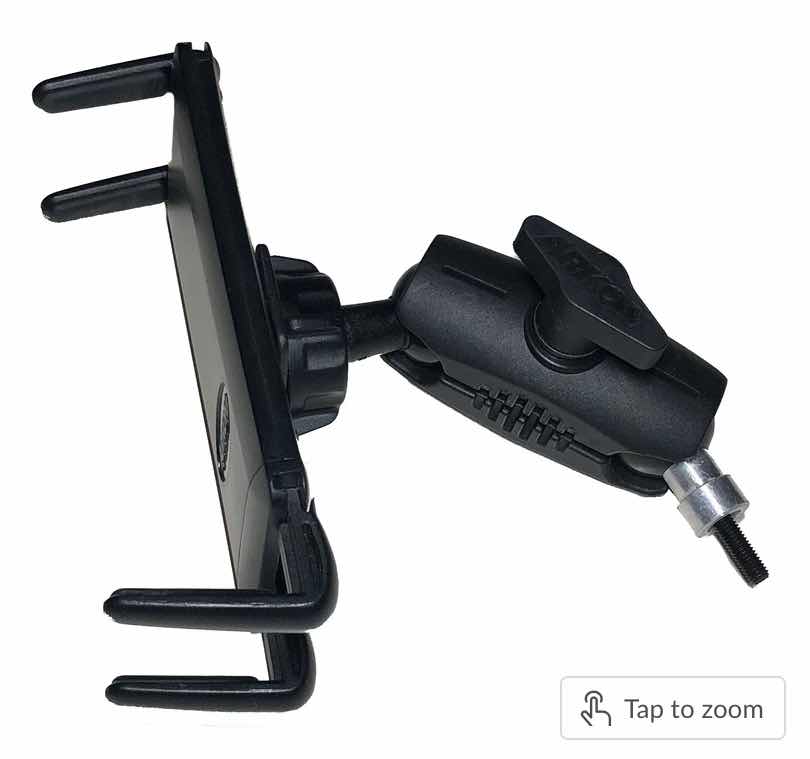
I decided on the mount above as it screws into the FWC cabinet for a secure mounting base and holds the IPad using 4 grips.

I don’t leave the IPad mounted while traveling as I spend much of my time on dirt roads that rock and shake everything, although normal driving would not be a problem leaving it mounted.

This mounting system is much more enjoyable than holding the IPad in my hands on my lap.

Brent

macaloney@hotmail.com


Upgrading Solar Charge Controller on FWC


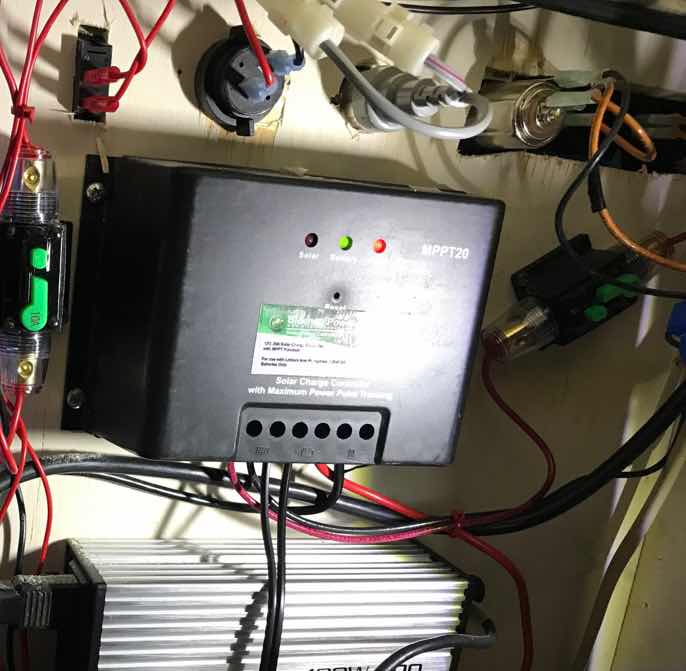
My entry into solar on my Four Wheel Camper (FWC) included a LiFeP04 only Charge controller from Bioenno for my 50 Ah Bioenno battery (photo above)

This charge controller worked fine gor me for my last 3 years of my FWC travels, but technology got me to change.

When I worked with my friend Bryce on his hybrid RAV4 vandwelling design he wanted solar for his 100 Ah Renogy battery.  He also chose a 50 Ah multi chemistry charge controller from Renogy.  The charge controller he selected was designed no only to pull in solar to charge his battery, but it also had an input from the engine to charge from that too.  In fact it would split charge from both, deferring to solar if available.  

I liked this concept as I had a power connection from my Tacoma engine to the FWC but to not overcharge the battery I manually had to manually switch between solar Vs engine charging.

What better solution to have, than to have this done all automatically!


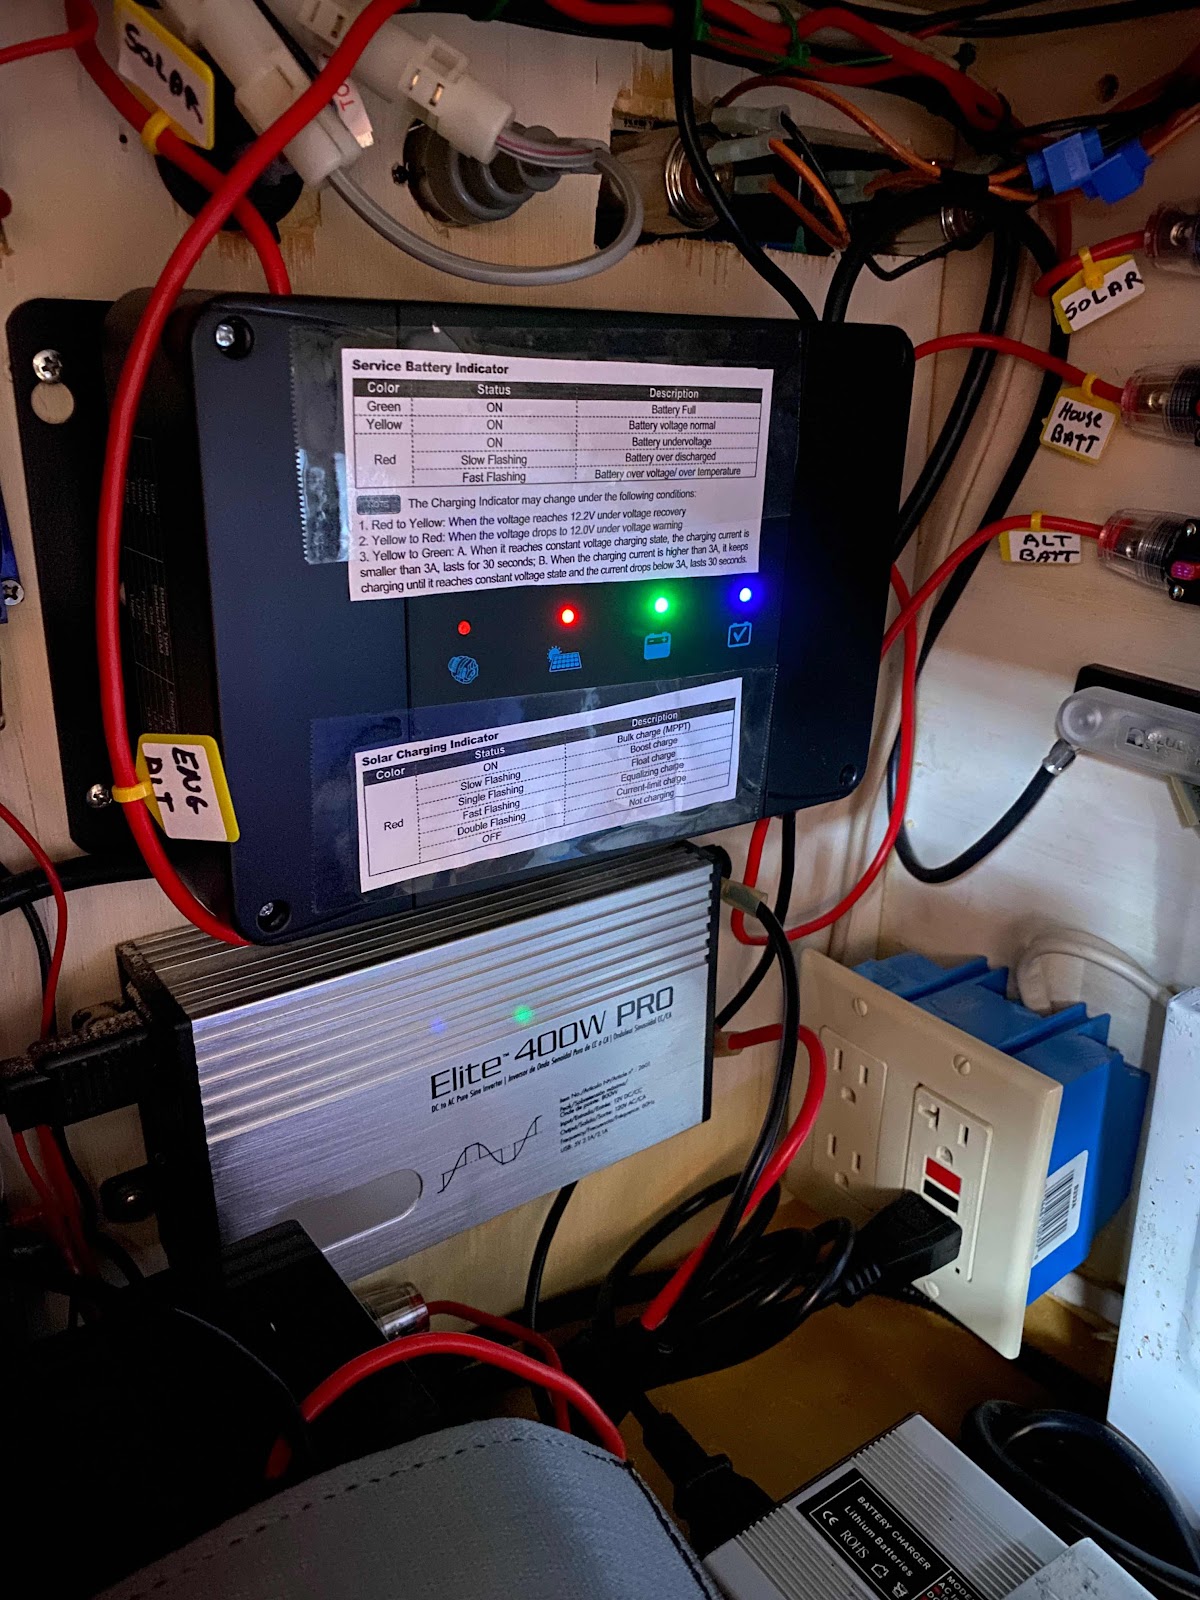
So, I decided to get the 30 Ah version of the 50 amp charge controller that Bryce got.  The model number for mine is DCC30S.(shown above)

It required wire routing changes and luckily I had enough space to put the Renogy charge controller where the Bioenno one was.

I also put labels on all the wires to and from and upgraded the Bioenno AC to DC charger to 15 amps from 10 amps for when charging from shore power. (Partially shown in bottom left of picture above)

There are 4 lights in the Renogy charge controller above.  From right to left;

- Blue - LiFeP04 chemistry charge
- Green - Battery is attached
- Red - solar power (blinking when maintaining battery)
- Red - engine charging

This charge controller change to include both functions has made a big difference in my 2021 travels. It also will make a big difference with simplicity of charging going forward.

I use an isolator between the engine and the FWC charging to protect my truck battery.  This charge controller is the same one from prior years and only sends power to the FWC once the engine battery is fully charged and this takes about a minute.

In theory I don’t need the separate isolator from the engine as the Renogy charge controller does this and also maintains the engine batter from solar once the FWC LiFeP04 battery is satisfied.  I don’t need this function and I keep my original design.

I’m thrilled with this upgrade and the ability to ignore the charging system.

Brent

macaloney@hotmail.com


Thursday, February 25, 2021

FWC Bunk Thermal Barrier


When driving across country I sleep with the roof down most of the time.  I do this for warmth and a sense of stealthiness.  

Out west in the winter I put the roof up and lay on my bench watching movies or TV and cold air rolls off the bunk and on my head and neck.

I’ve tried tilting the roof with the front over the bunk down and the back roof up, but still I get a cold draft.  Because I sleep in the bunk mostly, even with the top up the bunk space is only used for putting things there to get them out of my way.

I needed a solution to the cold draft, so this past fall (2020) I took a COVID mask trip to Joann Fabrics and bought some lightweight quilt material to make a bunk barrier. 


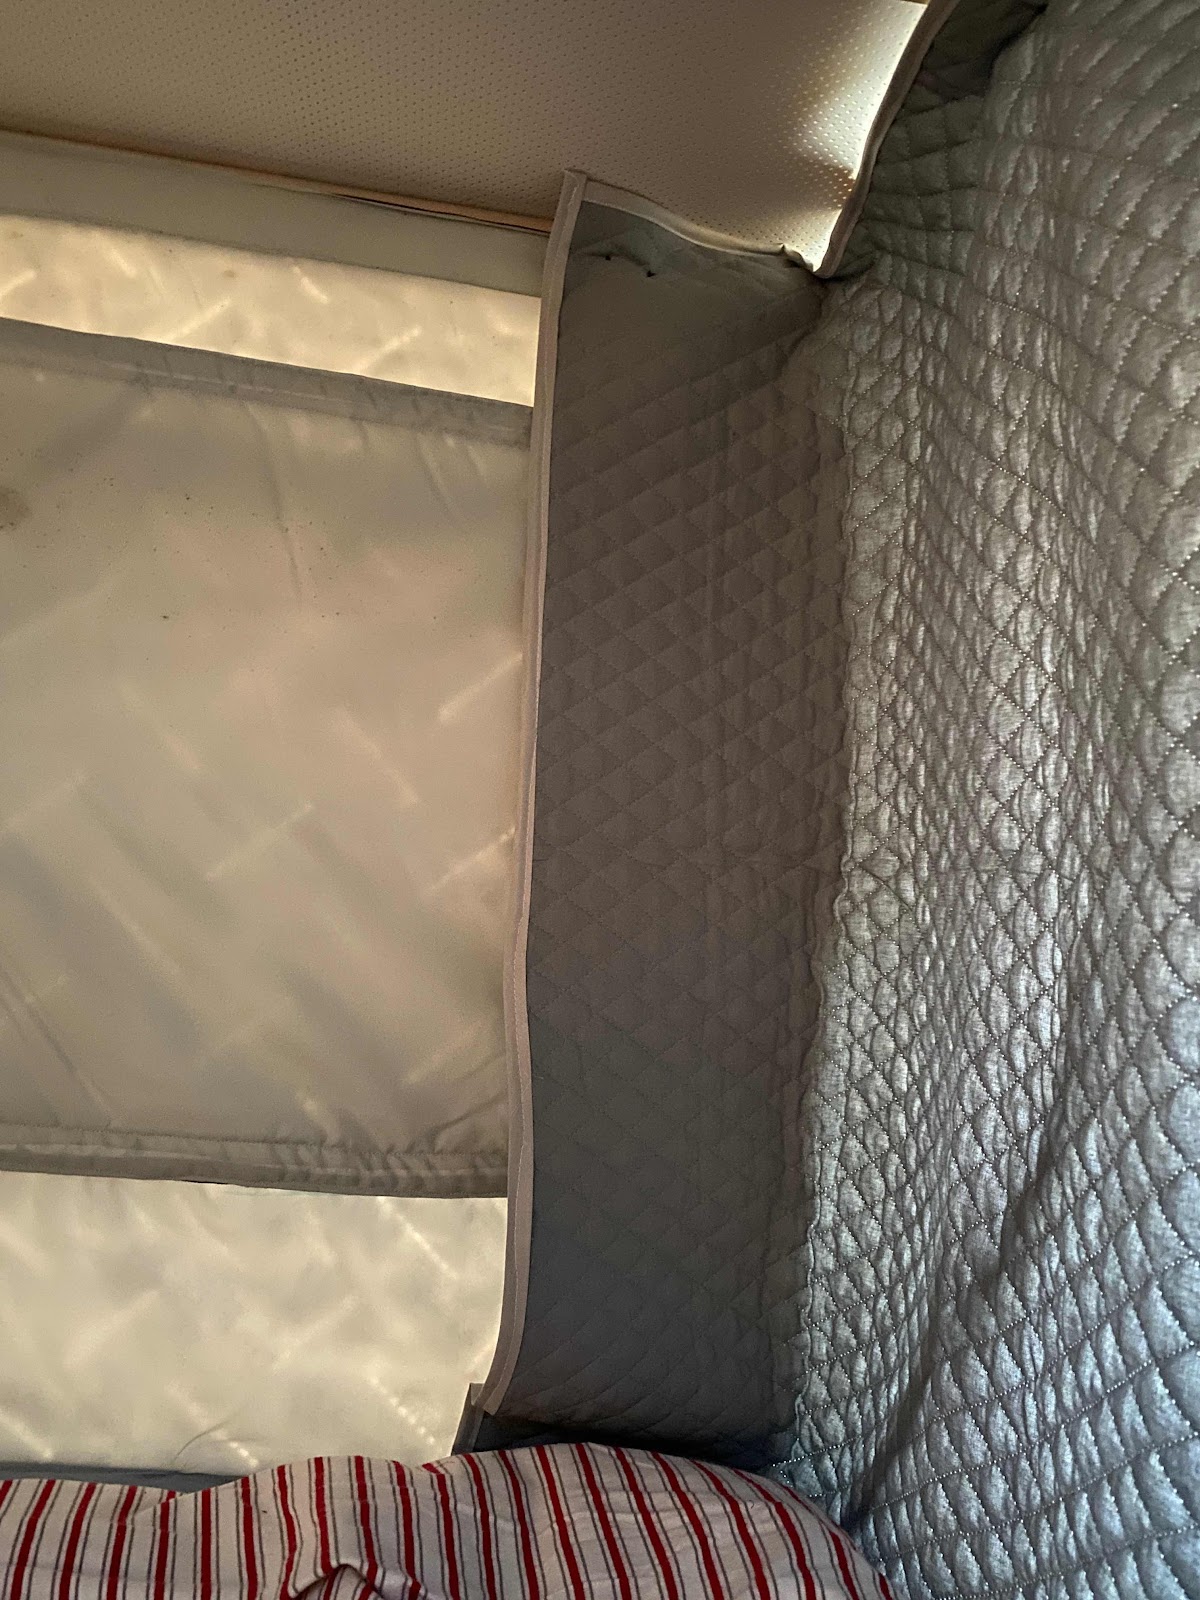
I sized the thermal barrier to tuck in the bottom of the bunk a few inches and wrap around on the outsides to make for a better fit


In trying to think of a way to hold the barrier up I thought of my friend David Swanson of Prius days who used rare earth magnets to hold curtains.


Dang, what a great idea.  I found some rare earth magnets at Joann Fabrics incased in plastic and used them by sewing them to the fabric and screwing them to the wooden roof brace in the ceiling or using industrial double sided tape to the magnets on the roof ribs.  (Don’t go to Joanne Fabric without looking for coupons.  The magnets are expensive and I got them 50% off.)

The other advantage of the thermal barrier is that when I’m heating my camper I don’t have to waste heat to warm the loft bunk.

Note that the material is not a heavy quilt and I lay it in the bunk when I close the roof.

I now have a good thermal barrier and I can put things up there when company comes over and they can’t see the mess.

The magnets make putting the thermal barrier up simple and fast.

Oh, although I usually get help from my wife in sewing I sized, cut, bound the edges with double binding tape, hand sewed the magnets on too.  I did need my wife’s help to give me instruction on using the sewing machine as she was away at the time.

Happy vandwelling.

Brent

macaloney@hotmail.com


Saturday, January 23, 2021

Eliminating Moisture Under Foam Mattress


When I was Prius dwelling I had a Thermarest mattress under my sleeping bag.  I would notice moisture under the sleeping bag where my torso was laying when I got up in the morning.  The colder it got there was more dampness.  I would fold back the sleeping bag during the day to dry things out.

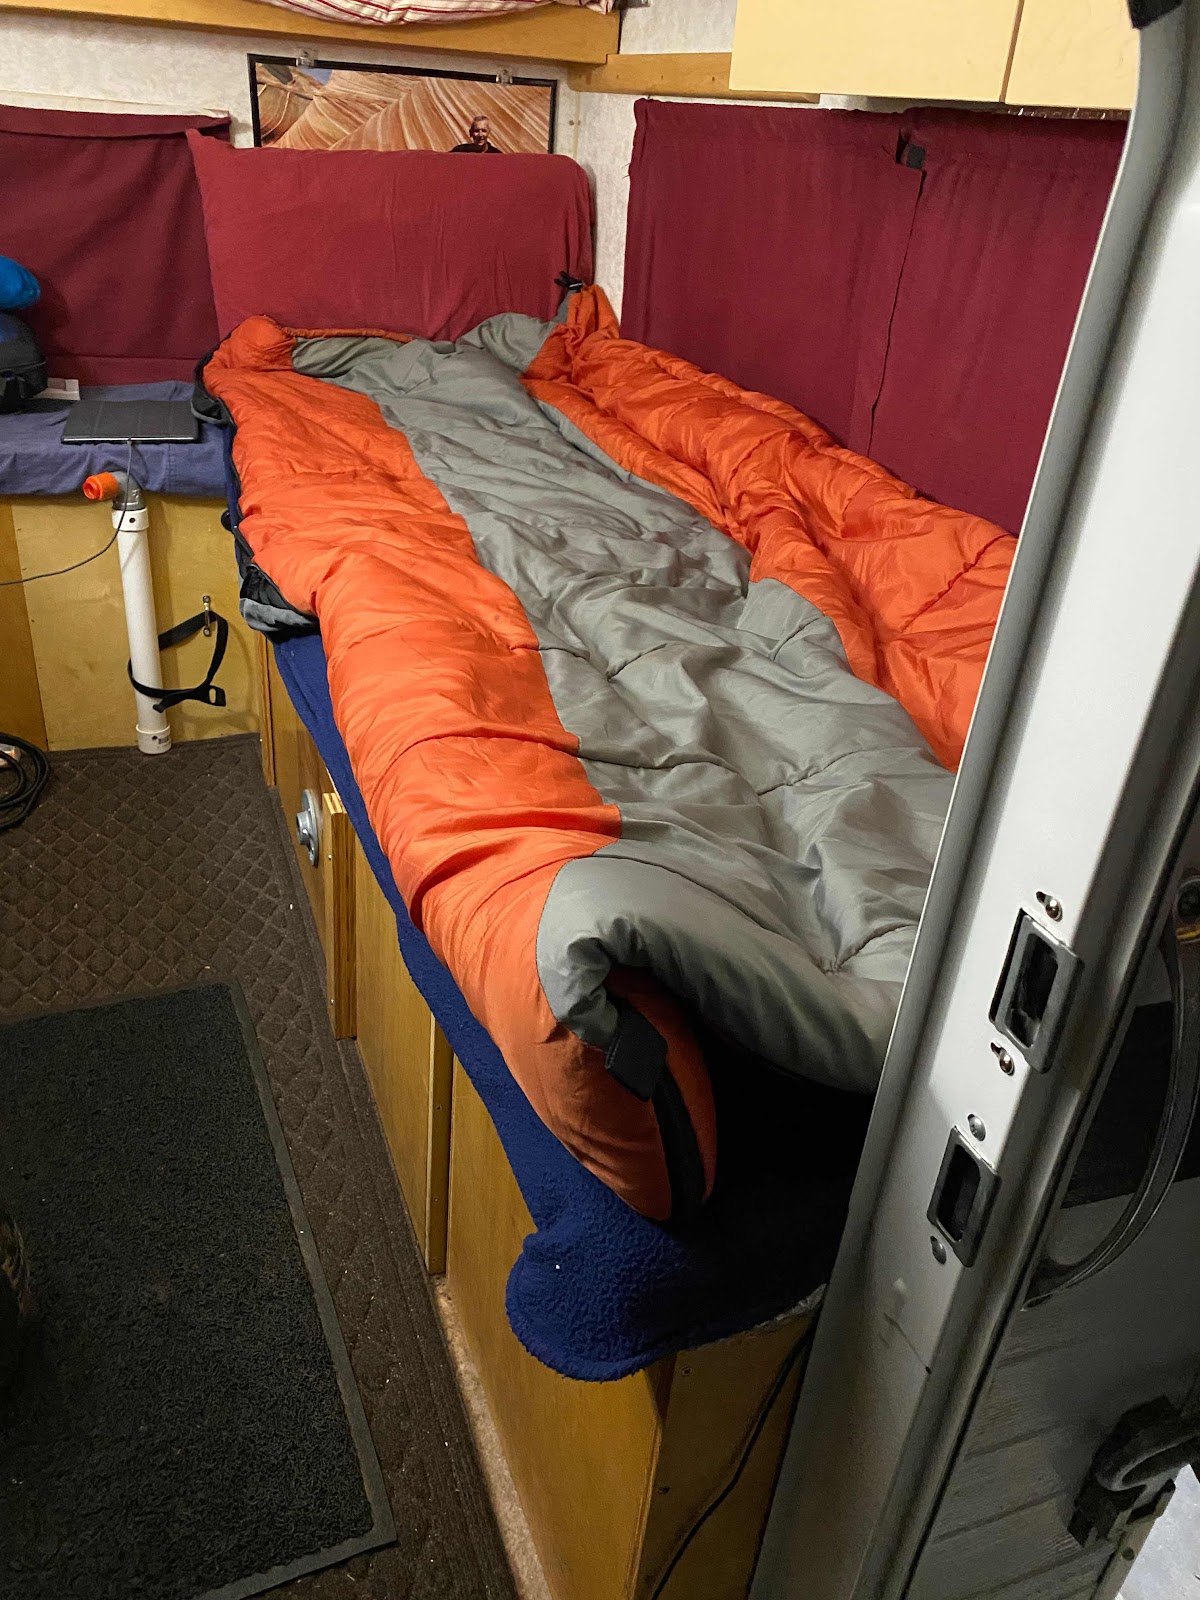
When I switched to the Four Wheel Camper (pick up camper) dwelling, I mostly slept on the passenger side bench seat.  This area is just a piece of plywood under me to the outside without insulation.  The above picture shows the bench with my sleeping bag on it.

Under the sleeping bag is 2” of foam mattress snd the colder it gets the more condensation collects on the bottom of the foam against the plywood.  On my previous years travels I would just flip the foam mattress to have it dry during the day. 


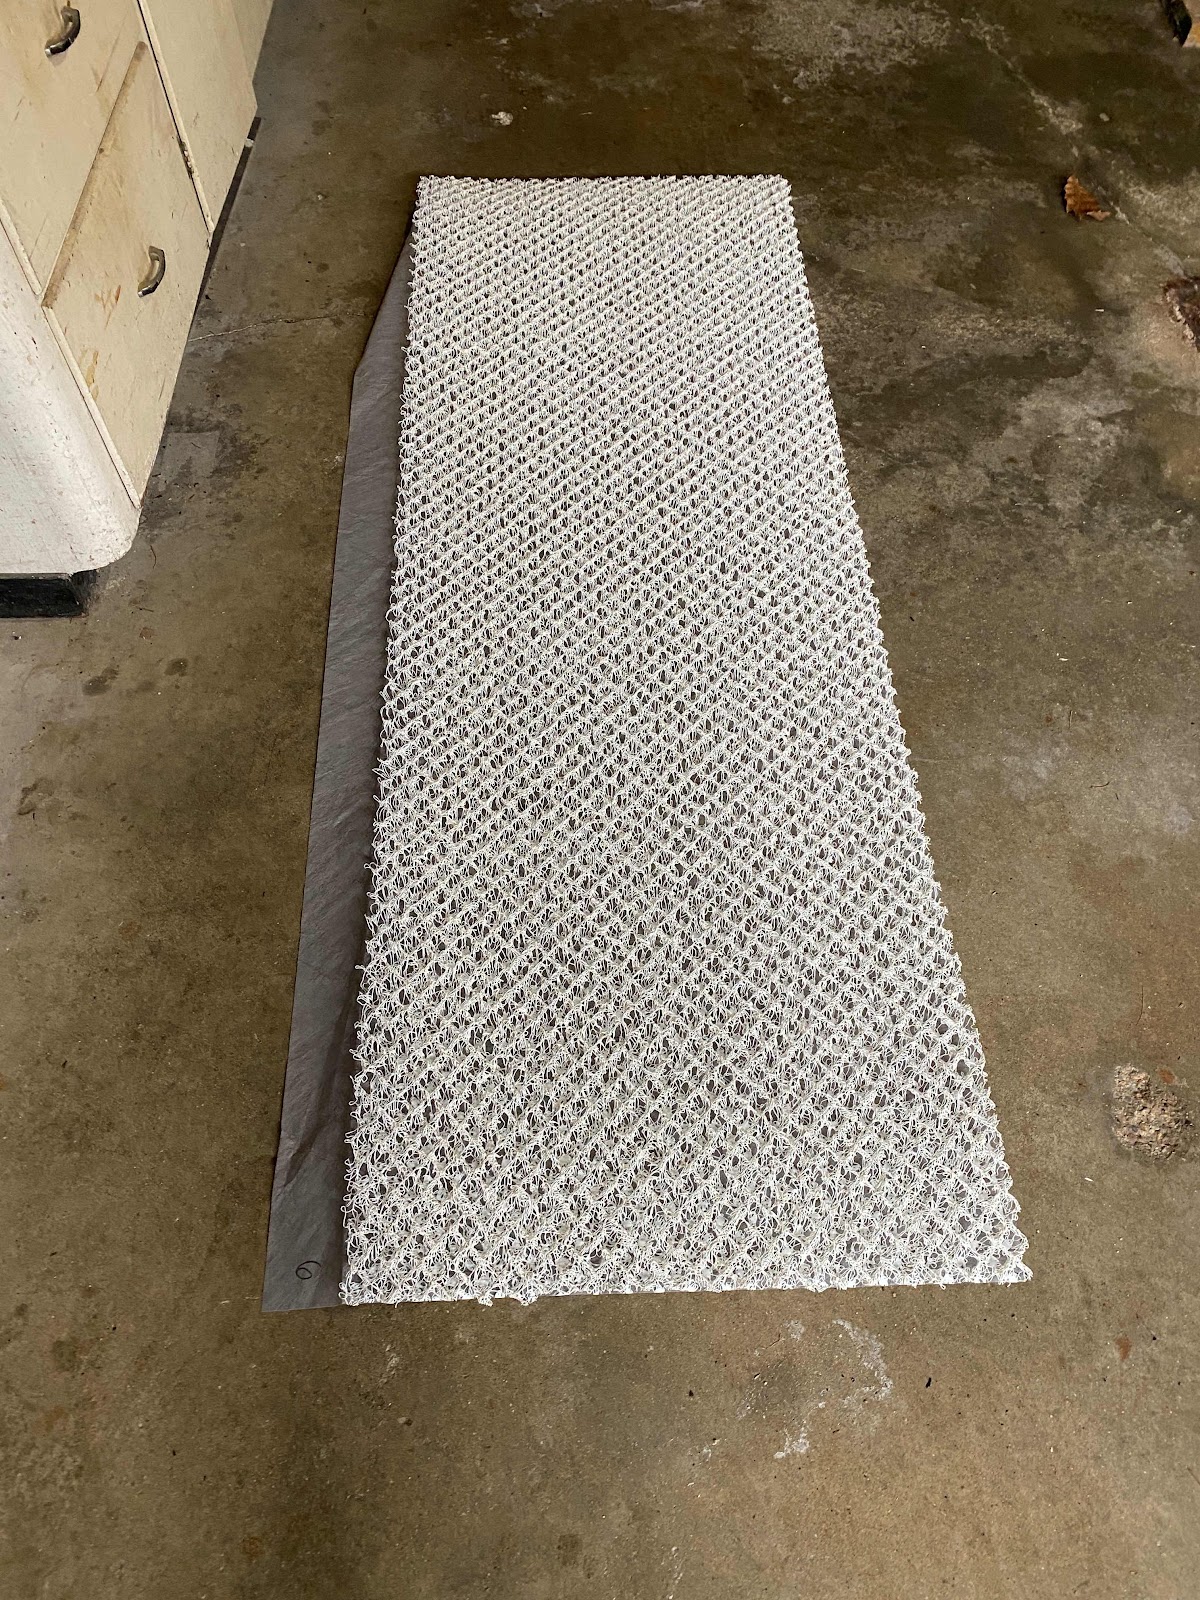
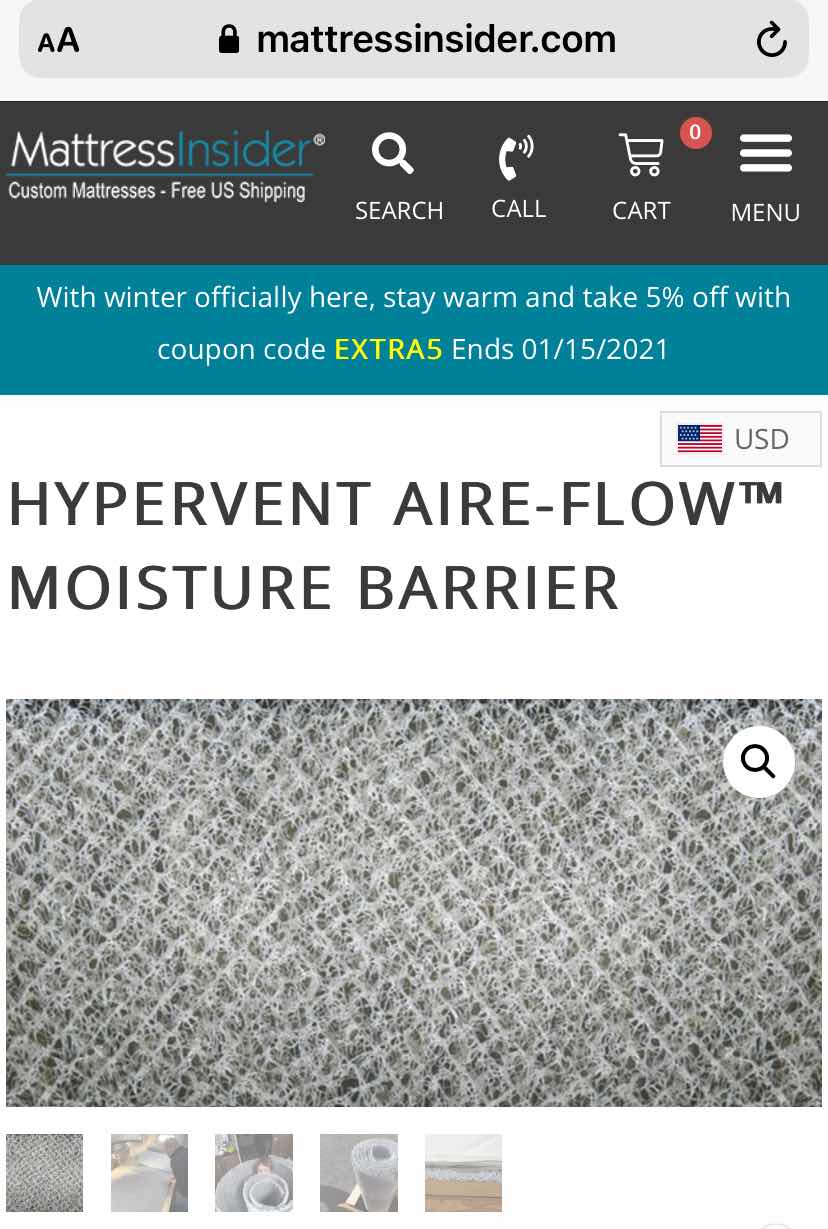
This year I found this moisture barrier for under mattresses in campers snd boats to eliminate moisture.


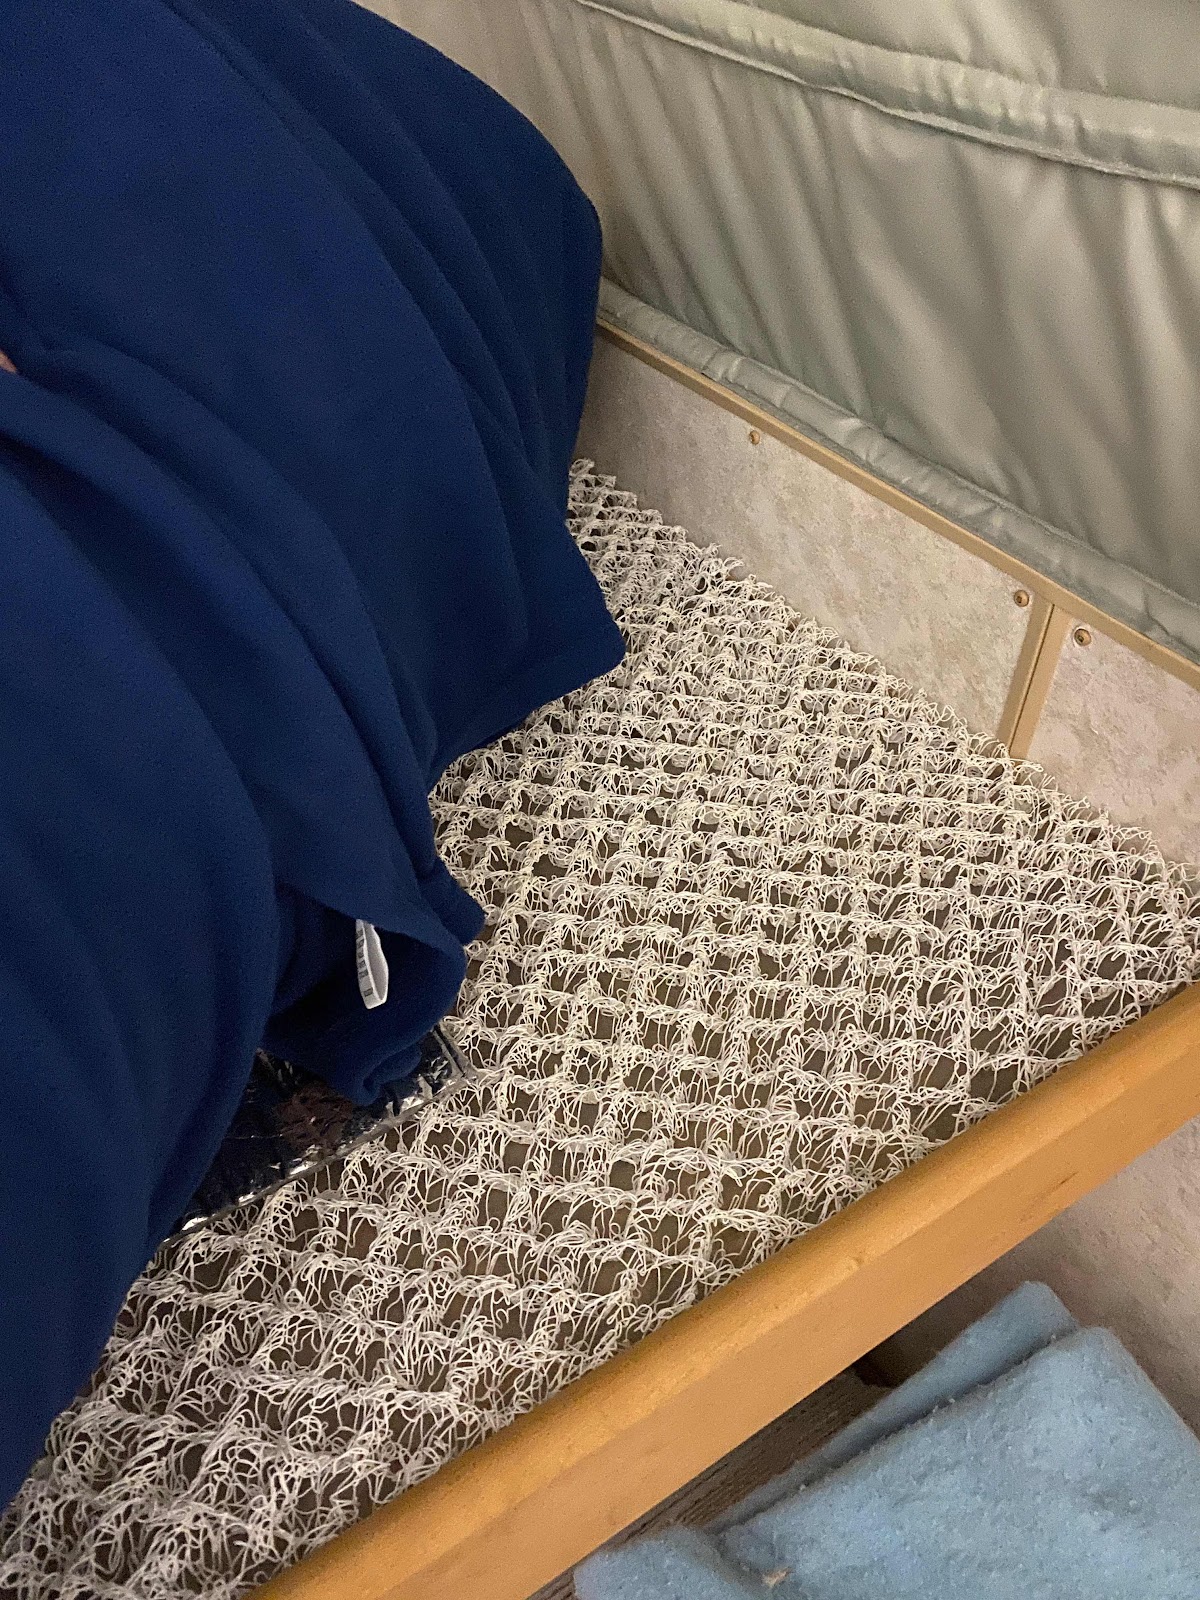
I bought one pieces 39” wide and 72” long and cut it to 25 “ wide to use as a moisture barrier under my bench/bed foam cushion.  I’ve tested it and there is no moisture in the AM and I’m pleased to allow air to circulate and keep the area dry.


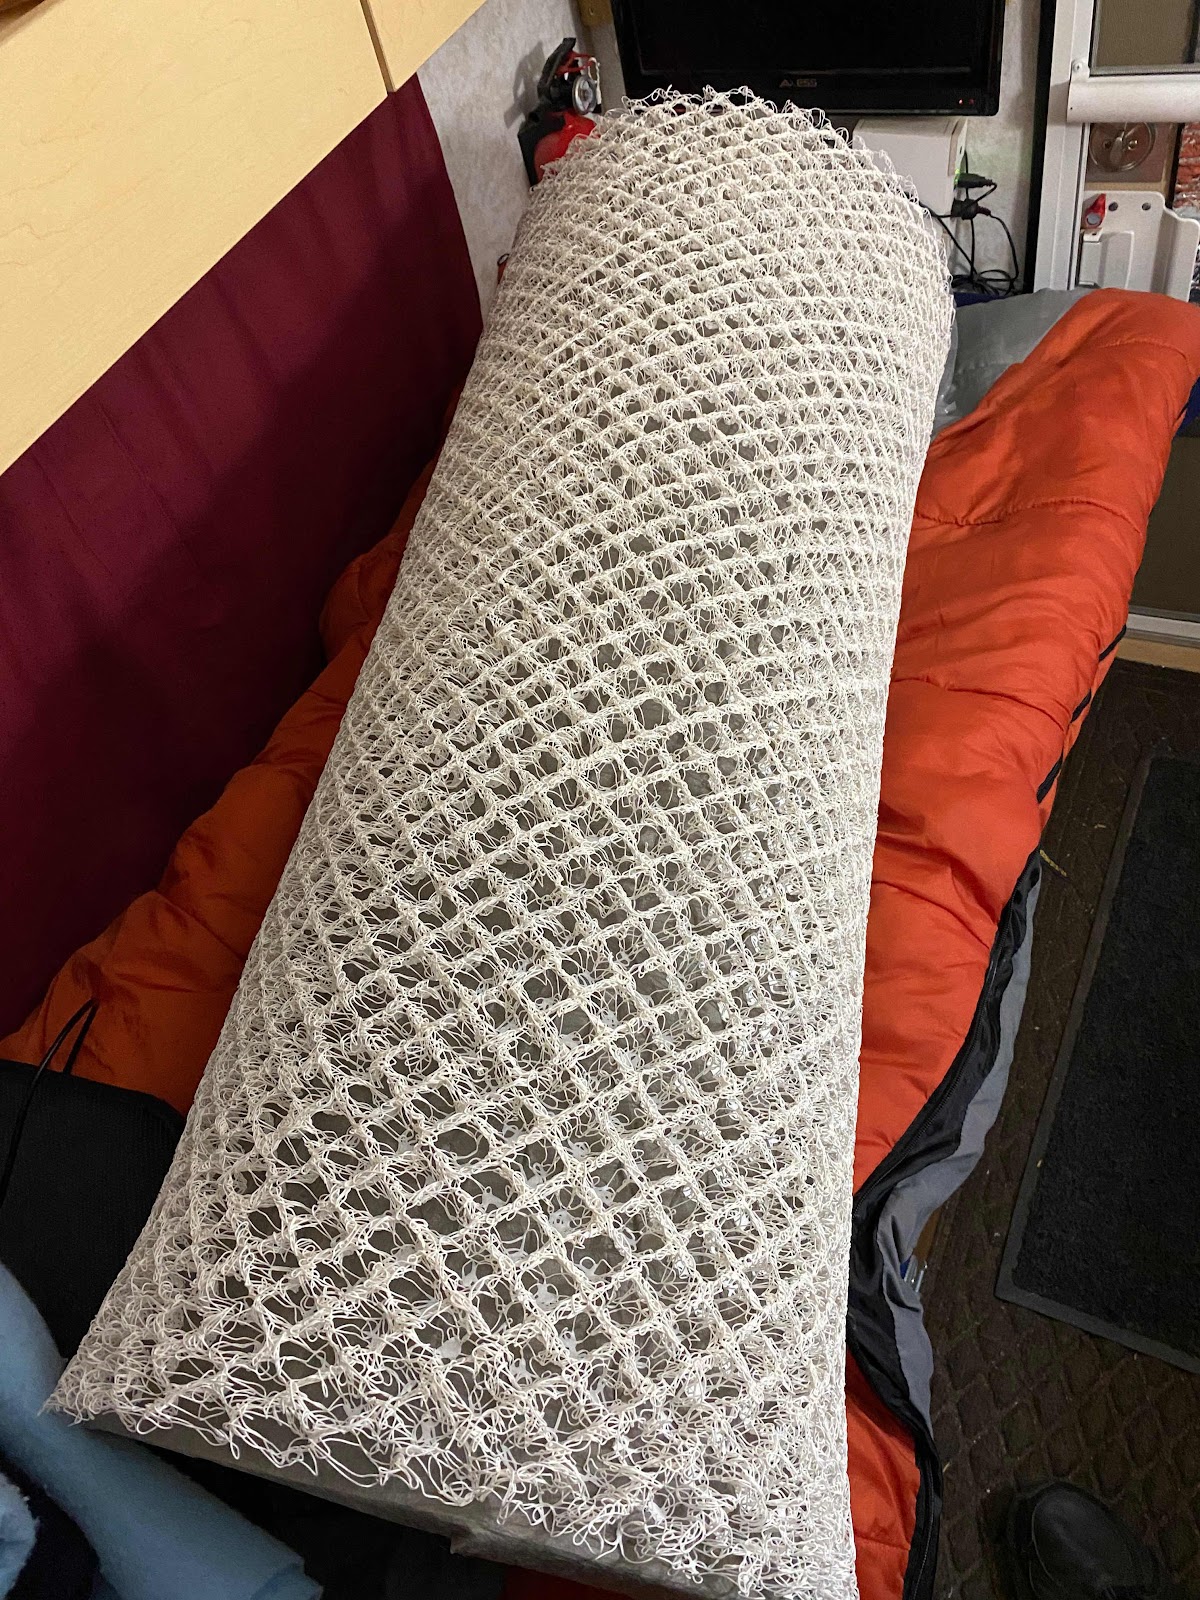
I liked it enough that I decided to also put the moisture barrier under the mattress on the overhang bed.  I only needed to buy one more piece the same size, and with the leftover piece from cutting the size for the bench, it gives me a full size mattress underlay moisture barrier.

The camper upper bunk can be bigger but I use standard full size sheets and this is big enough for two side to side as long as no one is over 6’ tall.


The moisture barrier can be easily cut with heavy duty scissors.  It is 3/4” thick and the webbing that make for an open airflow is moderately stiff but can be compressed with fingers.  When laying in it with foam above, as I’m using, it does not compress.

When I get on the road to 2021 travels I will get to test this moisture barrier a lot more.

Brent

macaloney@hotmail.com
Wednesday, January 20, 2021

New Tacoma - Rust on Rear Brake Drums

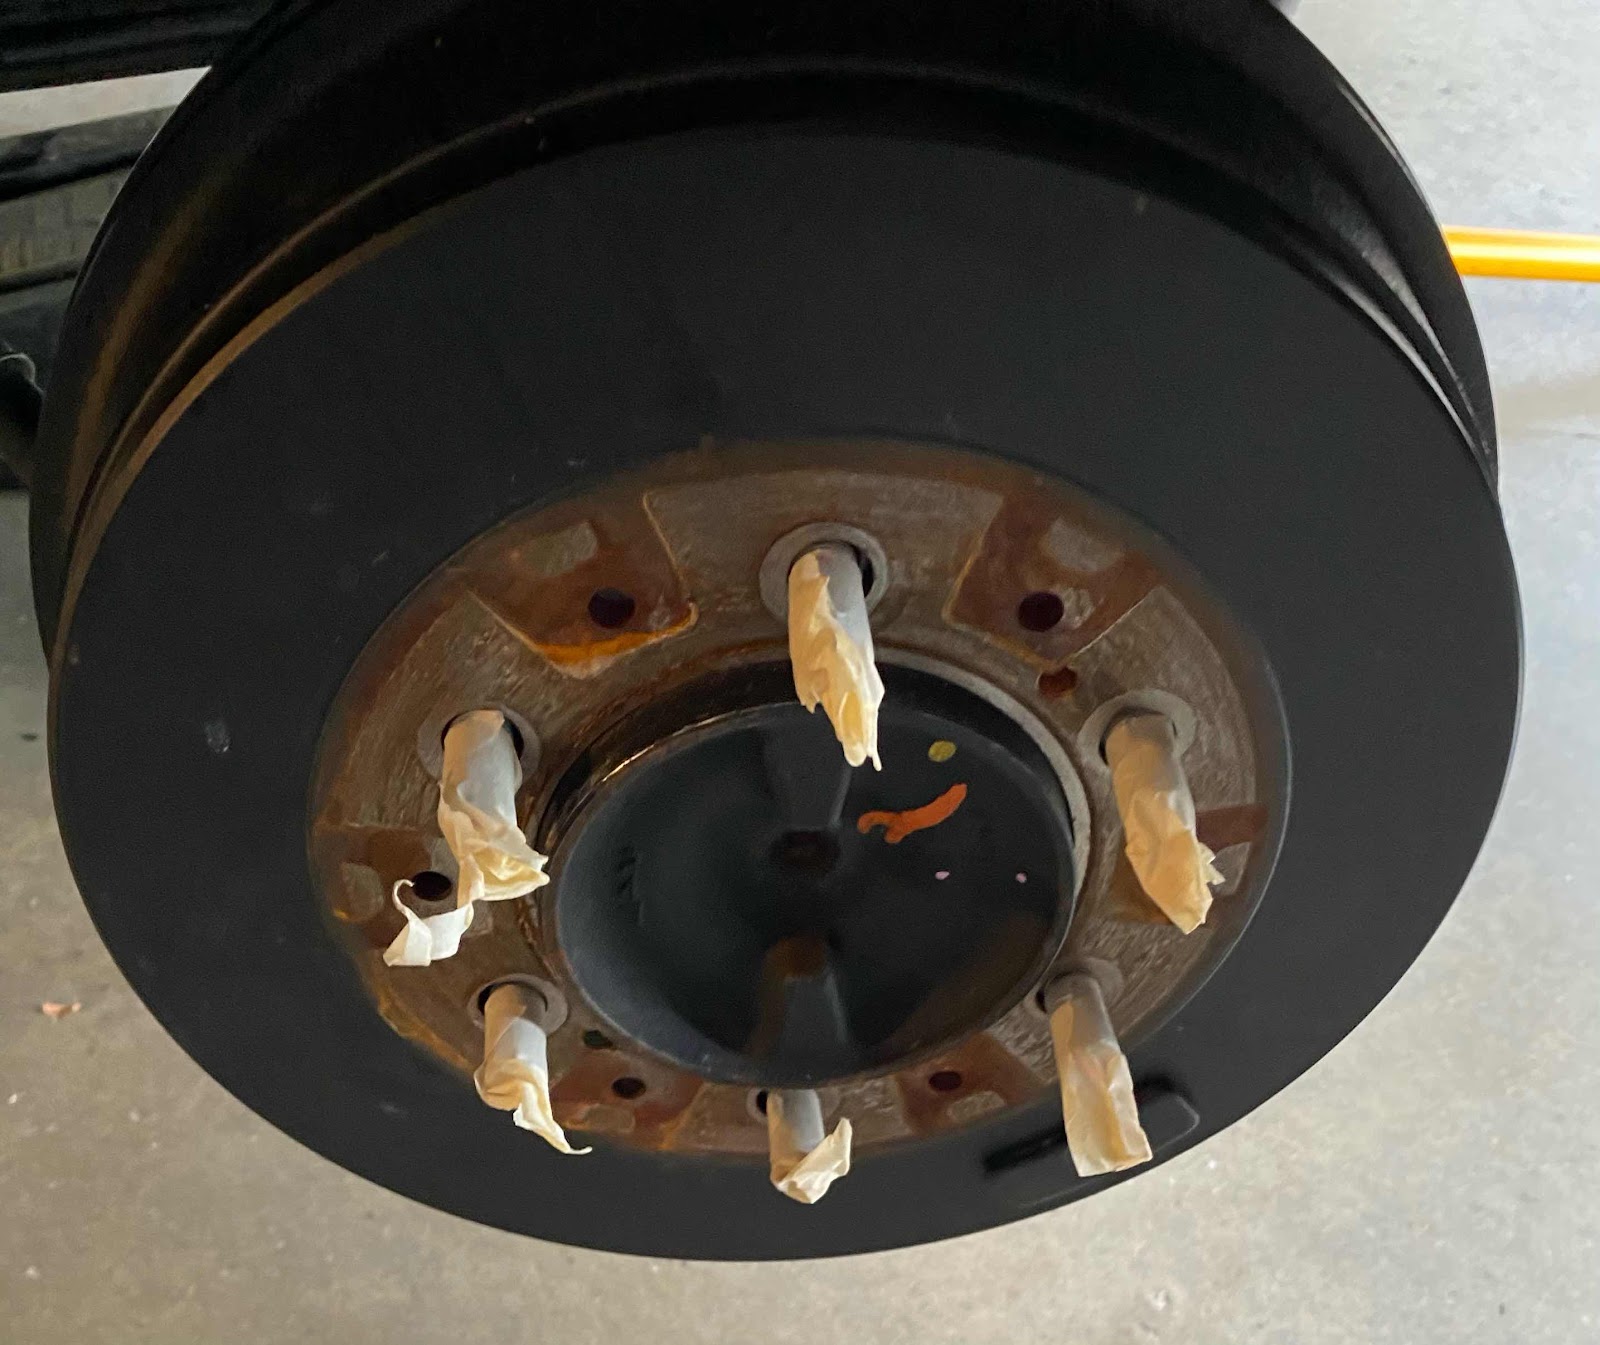
When I buy a new vehicle I don’t want to see rust!  In fact it is frustrating even if it is in a hidden part like the rear brake drums.  They paint all but where the wheel touches the drum?

So, when I jacked up the rear axle to put in airbag suspension I noticed the rear brake drums were rusted.


Above - is the drum as it came from factory with my masking tape on stud threads, ready for spray painting 


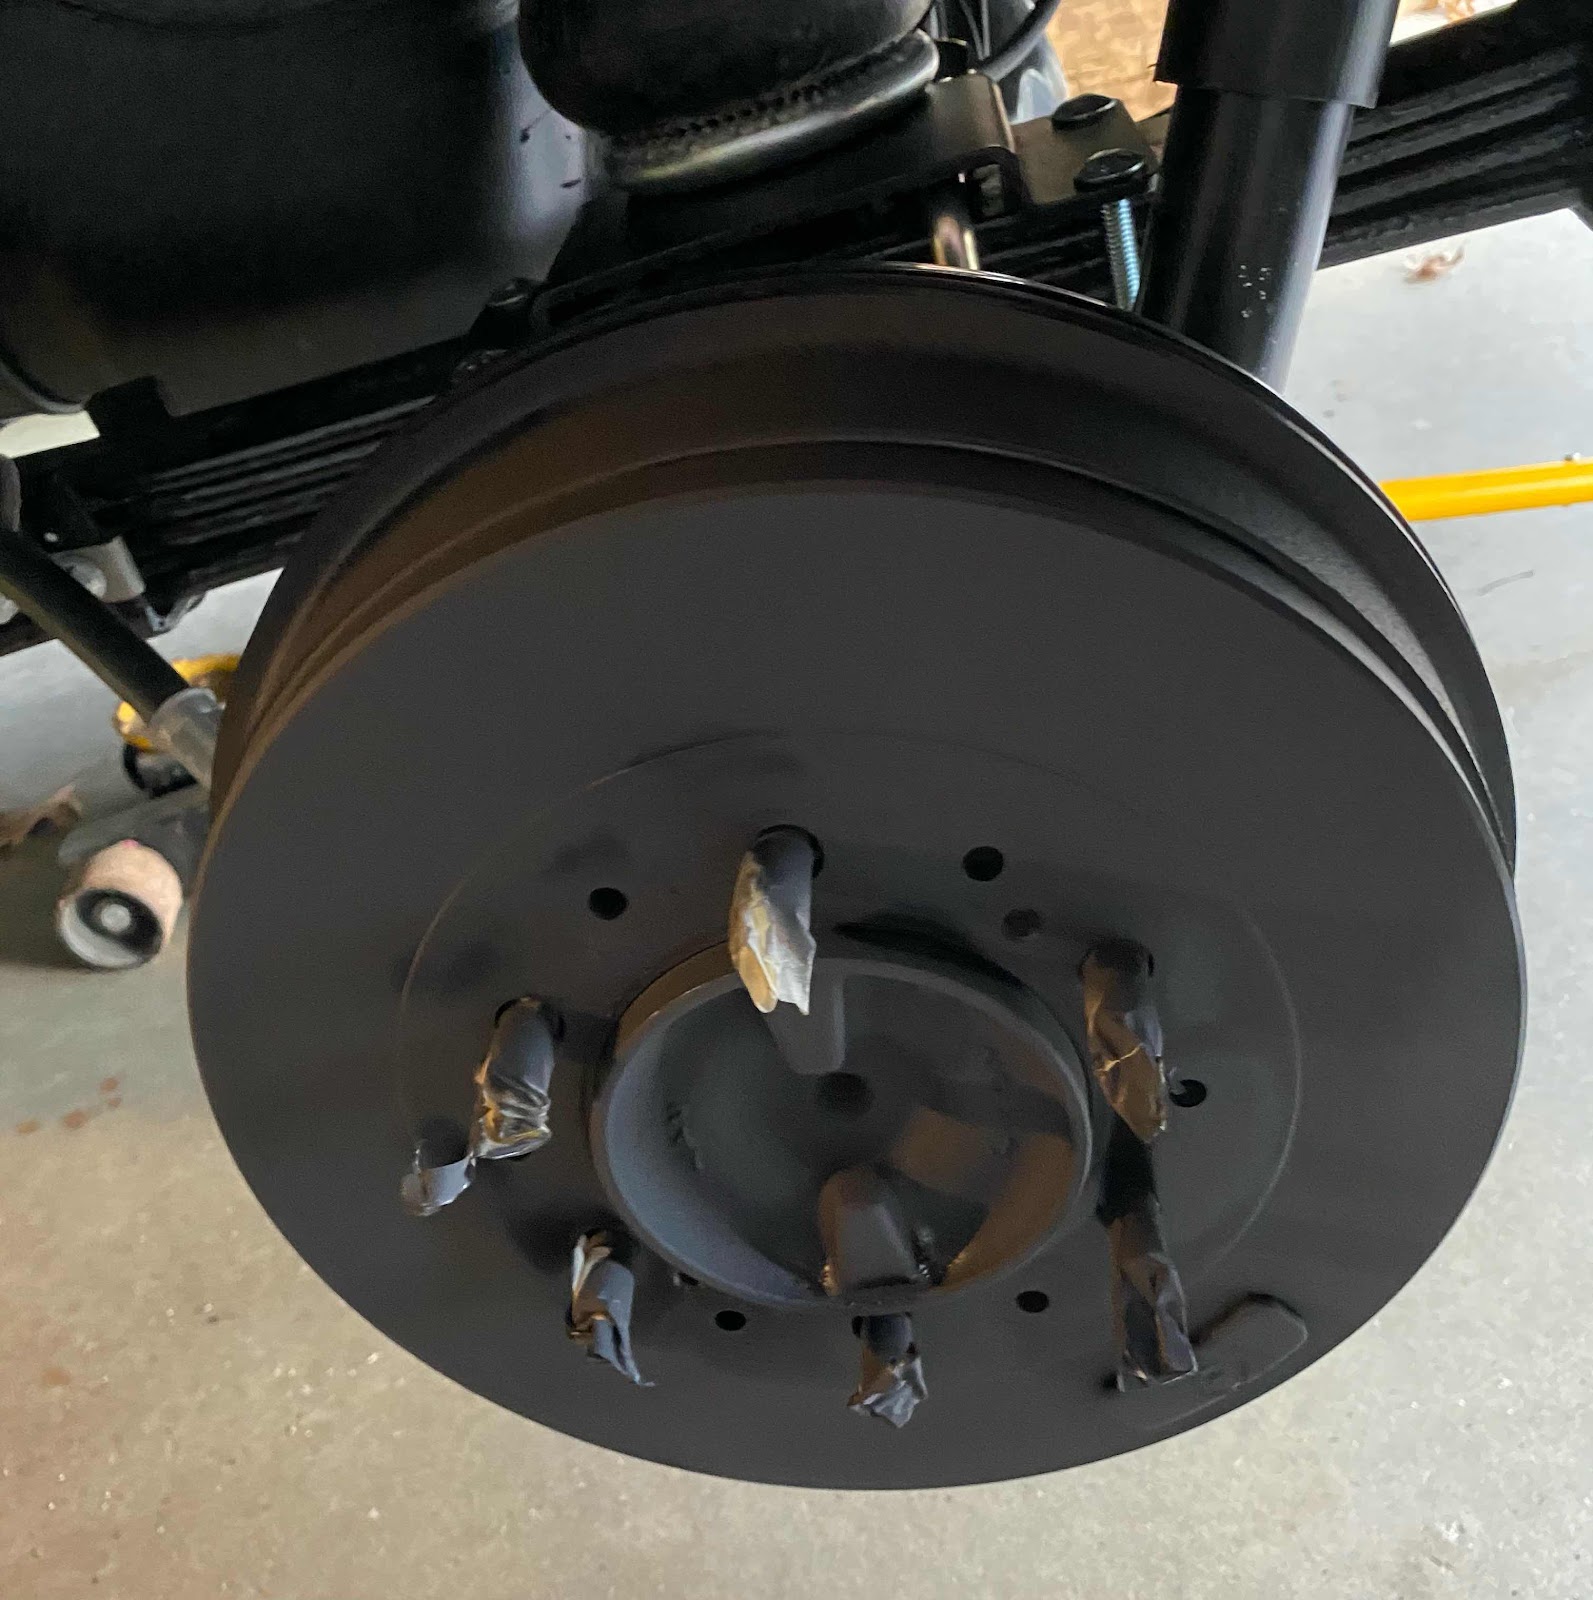
Here is the drum after I sprayed BBQ high temp paint on the drum before putting the wheels back on.

When I was underneath wiring the truck bed for camper power I noticed another thing that needs paint but it’s been to cold to paint that until it gets warmer.

Brent

macaloney@hotmail.com
Thursday, January 14, 2021

Inside Tacoma - Where To Mount Things


I wanted a clean look for the things I have mounted Ted in the cab of my Tacoma.  I found it!

From left to right is my phone, dash camera, ham radio microphone (radio is in the center console front pocket), and my rear camper camera screen (right).

The rear camper camera screen last year (2011 Tacoma) was mounted on top of rear view mirror with heavy duty Velcro. This screen gives me rear view while driving to see behind me with camper mounted.  Unlike the rear backing camera that comes with the 2021 Tacoma that only comes on when in reverse, I can turn this on while driving to see what is behind me.  The camera is wireless powered from the camper.

When I don’t need the rear view camera screen it easily comes off the dash.  Note, there are different mounts available but I decided to make my own mount for the screen from available parts and parts from Amazon.


I decided to go with the Taco Garage DMM mounting system. It was reasonably cost effective, although you should buy the 1” ball mounts from DMM as the screw size used on the mount are not the standard 1/4-20”.


DMM ball mount with single stud.


I bought 3 1” ball studs to mount in the dash frame (4th ball came with phone mount for DMM) that is a do-it-yourself build with a YouTube with step by step directions.


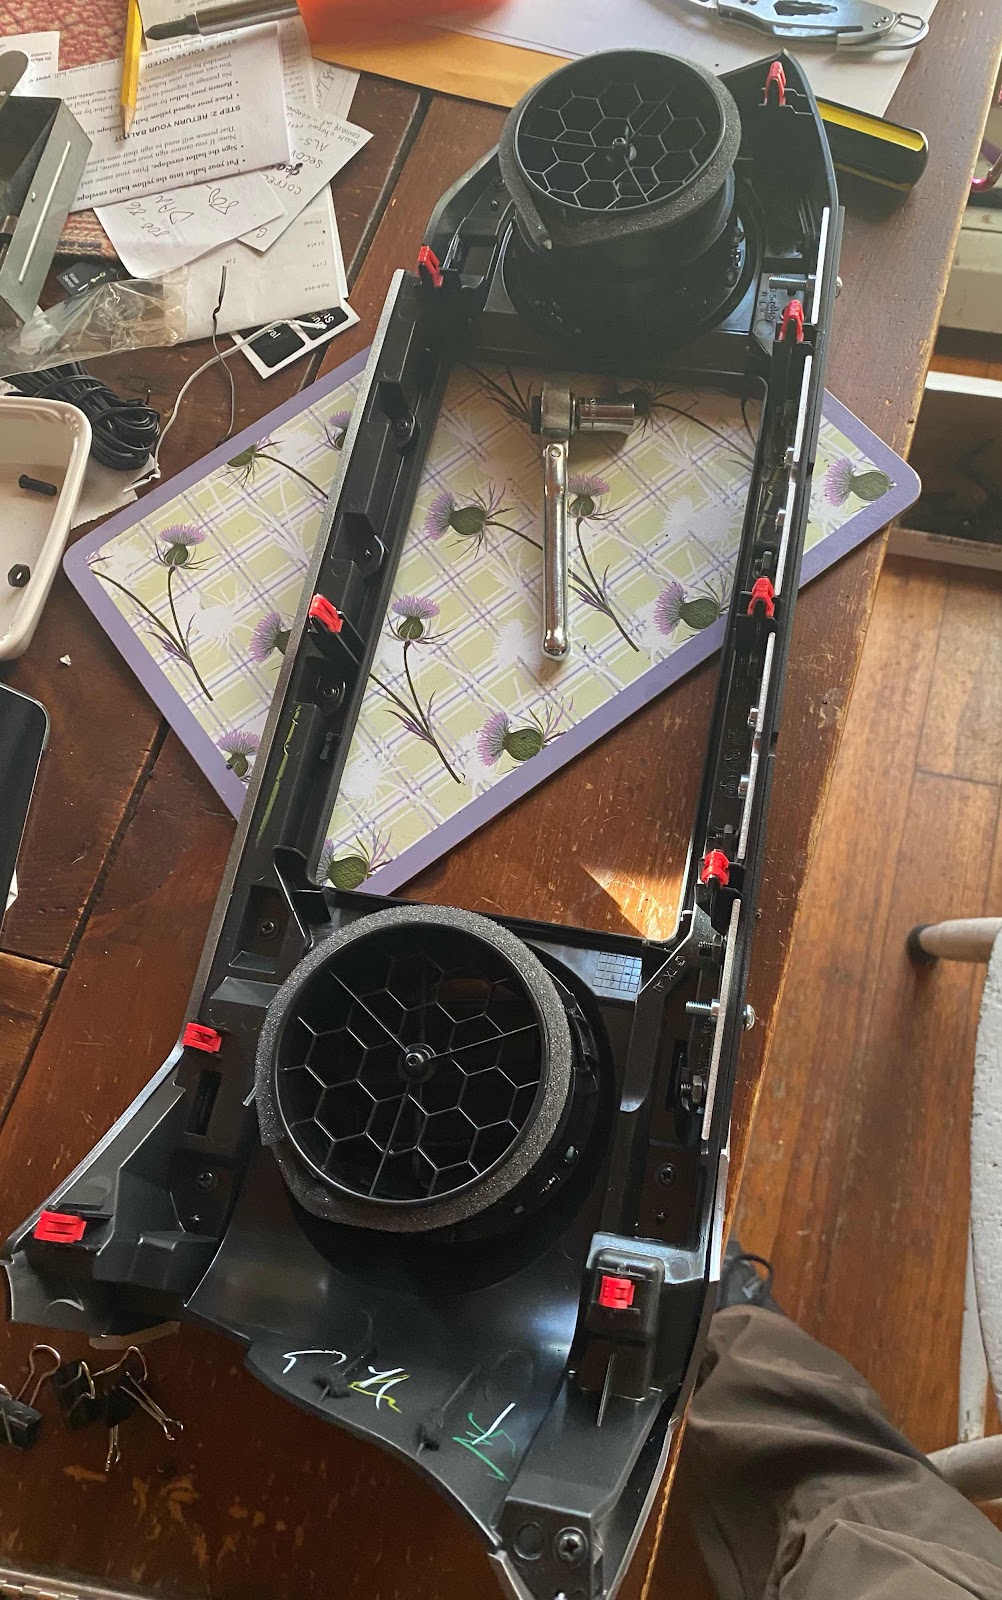
Here is my upper dash fram that I’m installing the modification to.  The red tabs is what holds this plastic frame to the dash.


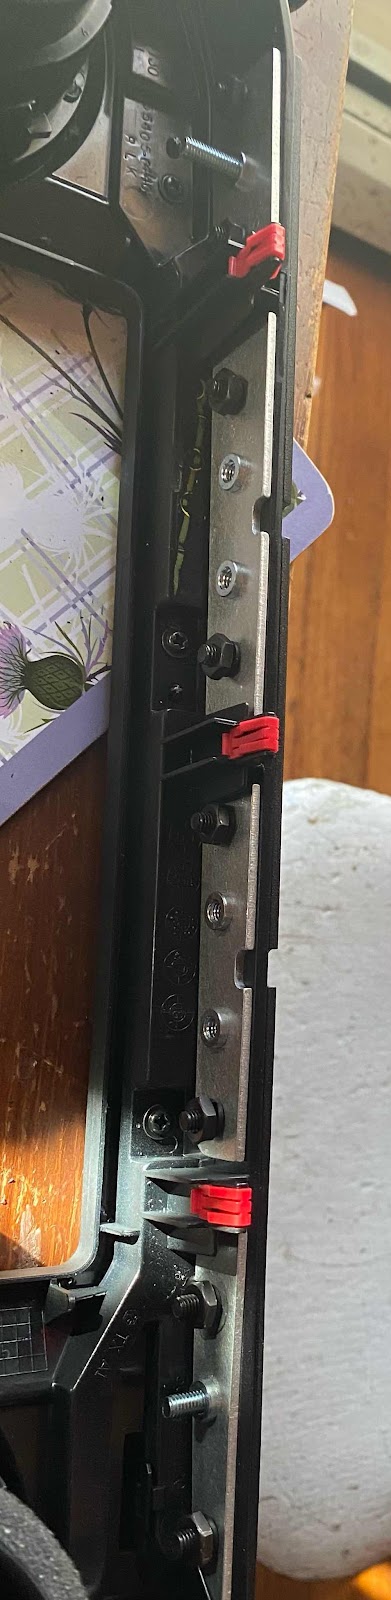
The modification is basically a top black metal trim and the bar stock under with the mounting nuts.  The plastic is sandwiched between the two.

What I like about this modification is that I can remove all mounts and you don’t see the modification.


Above is the black trim piece of metal that fits perfectly into the gap between the plastic frame and the dash.


My first mount was my phone.  I also bought this mount from Taco Garage and it is secure. 


The phone mount came with one ball mount with center stud.

If you buy the 1” ball mount any 1” ball camps can be purchased from places like Amazon.  

I disliked the phone mount I had in my older Tacoma as it covered the vent.  It also gets my phone up higher when running google maps.

Brent

macaloney@hotmail.com